Submitted by Jon Reed on
iOS 9 introduced several new features that greatly improve the overall Mail experience - the ability to preview emails and links within them using 3D Touch, the ability to attach files and save attachments to iCloud Drive and the ability to annotate attachments. The new Markup option lets you add comments, draw on, highlight and even add your signature to attached documents (only images and PDFs for the time being) right from the Mail app. Say you have a project at work and a document is being passed around the team for additions, comments etc. If you are on the go and want to quickly point something out or add some short comments in the margins, this is the perfect tool for it. Here is how you use it:
1. Go to your Mail app and open the email with the attachment you want to annotate. Tap and hold on the attachment within the body of the email until the Share menu comes up.
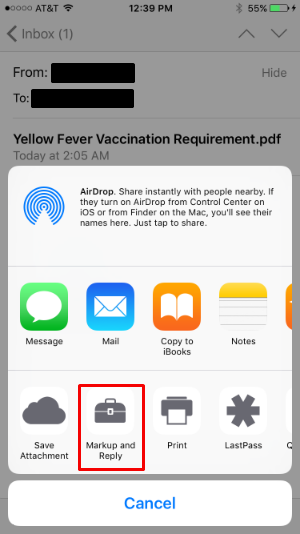
2. Tap on "Markup and Reply" on the bottom tier of the window. This will automatically open a reply email and open up the attachment so it can be annotated.
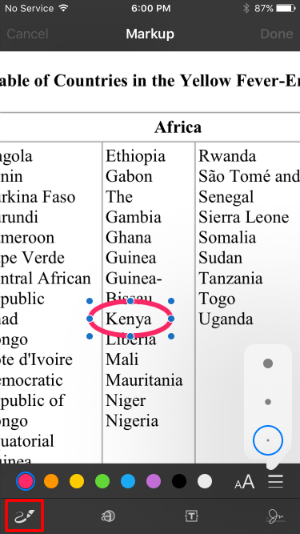
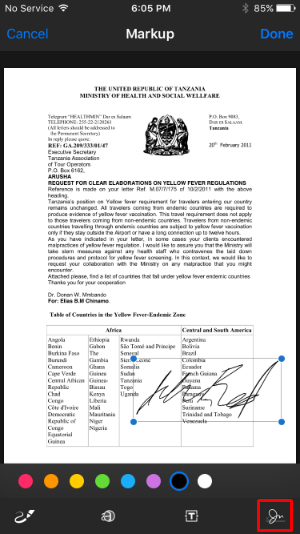
3. Now you are in the Markup window. There are four tools at the bottom of the screen - a draw tool, a magnifier, a text tool and a signature tool.4. The drawing tool allows you to make any kind of marks you want in a variety of colors. If you draw rough shapes, say a circle around something, it will give you the option of making it a perfect circle, which you can then change the size of, or elongate into an oval, etc. with drag points. Same goes for other shapes. You can also change the thickness of your brush.
Newest iPhone FAQs
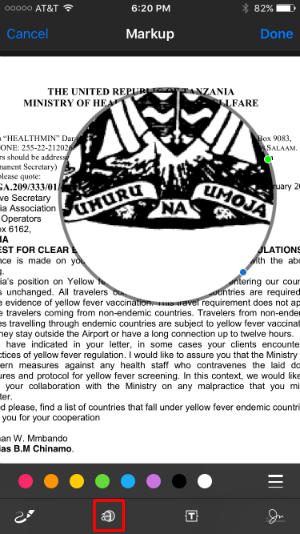
5. The magnifier tool places a magnifying circle on the screen that you can move around to draw attention to detail. You can drag on the green dot to increase and decrease the magnification within the circle and drag on the blue dot to increase/decrease the size of the circle.
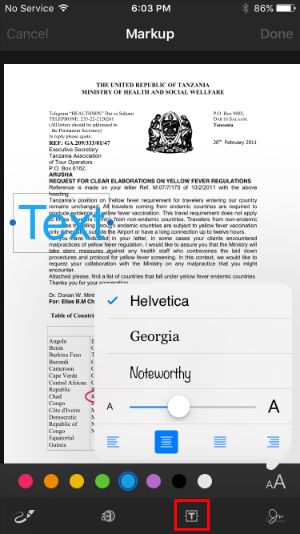
6. The text tool opens a text box that you can move around the screen and change the size of. You can change the font size and the justification, and you can choose between Helvetica, Georgia and Noteworthy fonts. You can also change the color of the text.
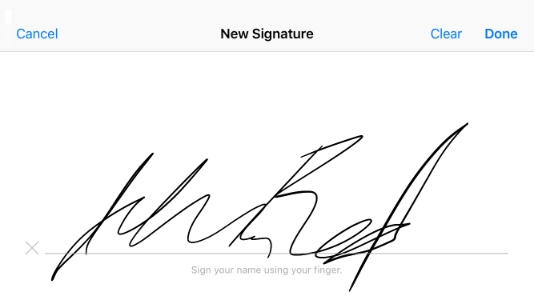
7. The signature tool lets you add your signature to a document. At first it will take you to a landscape oriented page where you sign your initial signature. It stores that and you can add it to the attachment, move it around and change the size. You can always go back and make a new signature.
8. When you are finished, tap Done in the top right. This takes you to the reply email where you can write the body of the email, add recipients, cc, etc.
That's all there is for now. One major oversight is the lack of an "undo" button. You can use shake to undo, but it is very clunky. The first thing it asks you is whether you want to "Undo Address Addition," which, if you say yes to, closes the entire response email, including your altered attachment. Right underneath that prompt is another undo prompt, and this is the one that refers to your last action. Another problem is that there is currently no way to save your annotated attachment, other than sending it to yourself. Hopefully these two issues will be remedied in an upcoming iOS update, but for now, they are definitely going in the right direction with this tool.
