Submitted by Fred Straker on
Third party apps such as Instagram are no longer the only way to get a hip, retro filter look on the iPhone camera. For those with iOS 7 and the iPhone 5 or later, eight filters are built right into the stock Camera app. These are titled Mono, Tonal, Noir, Fade, Chrome, Process, Transfer and Instant.

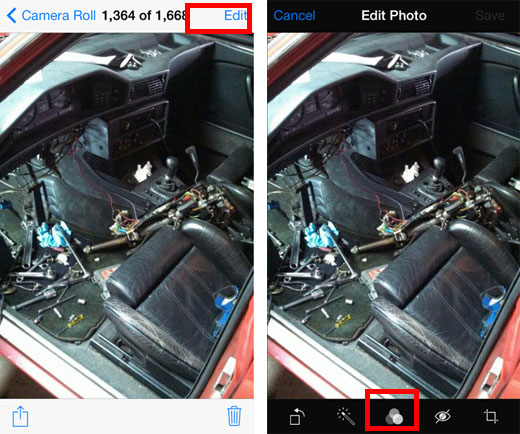
Each filter can be used with normal, flash, or HDR iPhone photos from the Camera Roll. To apply a filter to an existing image, start by opening the Photos app and viewing the photo you wish to change. Tap Edit in the upper right corner of the display. From the Edit Photo screen tap the center icon at the bottom that has three circles.

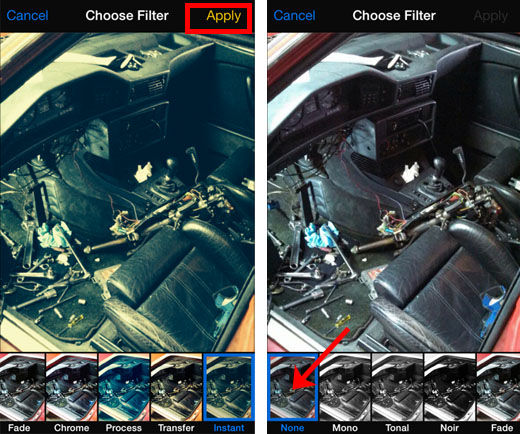
From here, you will be presented with all of the filter options. Touching a filter type will preview how this filter will change your image. Once satisfied with the filter selection, tap Apply in the upper right corner to change the image. Tap Save to save the changes.
The new image will overwrite the original in the Camera Roll. No worries if you need the original colors back. Simply repeat the process, selecting the filter labeled "None" then apply and save. The filter will be removed.
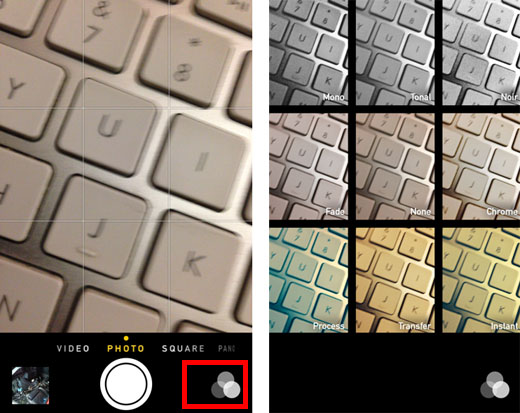
Filters can also be added to images on the fly when shooting pictures. From the Camera app, tap the icon in the lower right corner that has three circles. You will see a live preview of the iPhone camera images with each of the eight filters applied. The center preview image shows the image without a filter.
Newest iPhone FAQs
Tap the filter you wish to use while snapping photos and each image will be saved to the Camera Roll with the filter applied. You can tell that a filter is engaged when the filter icon in the lower right corner shows three circles in color, instead of grey. Even when shooting with a filter on, the original image is not lost. Filters can be removed after shooting by applying the "None" filter in the Camera Roll.