Submitted by Jon Reed on
Notes was the first app to feature a scan document option, which debuted with iOS 11. iOS 13 has added that feature to both Mail and Files. It makes the most sense for Files to have a scanner, since you can attach documents from Files to both Notes and Mail, and it gives you a place to store the scanned document if it is something you'll want to access again in the future.
Here's how to scan a document from the Files app on your iPhone:
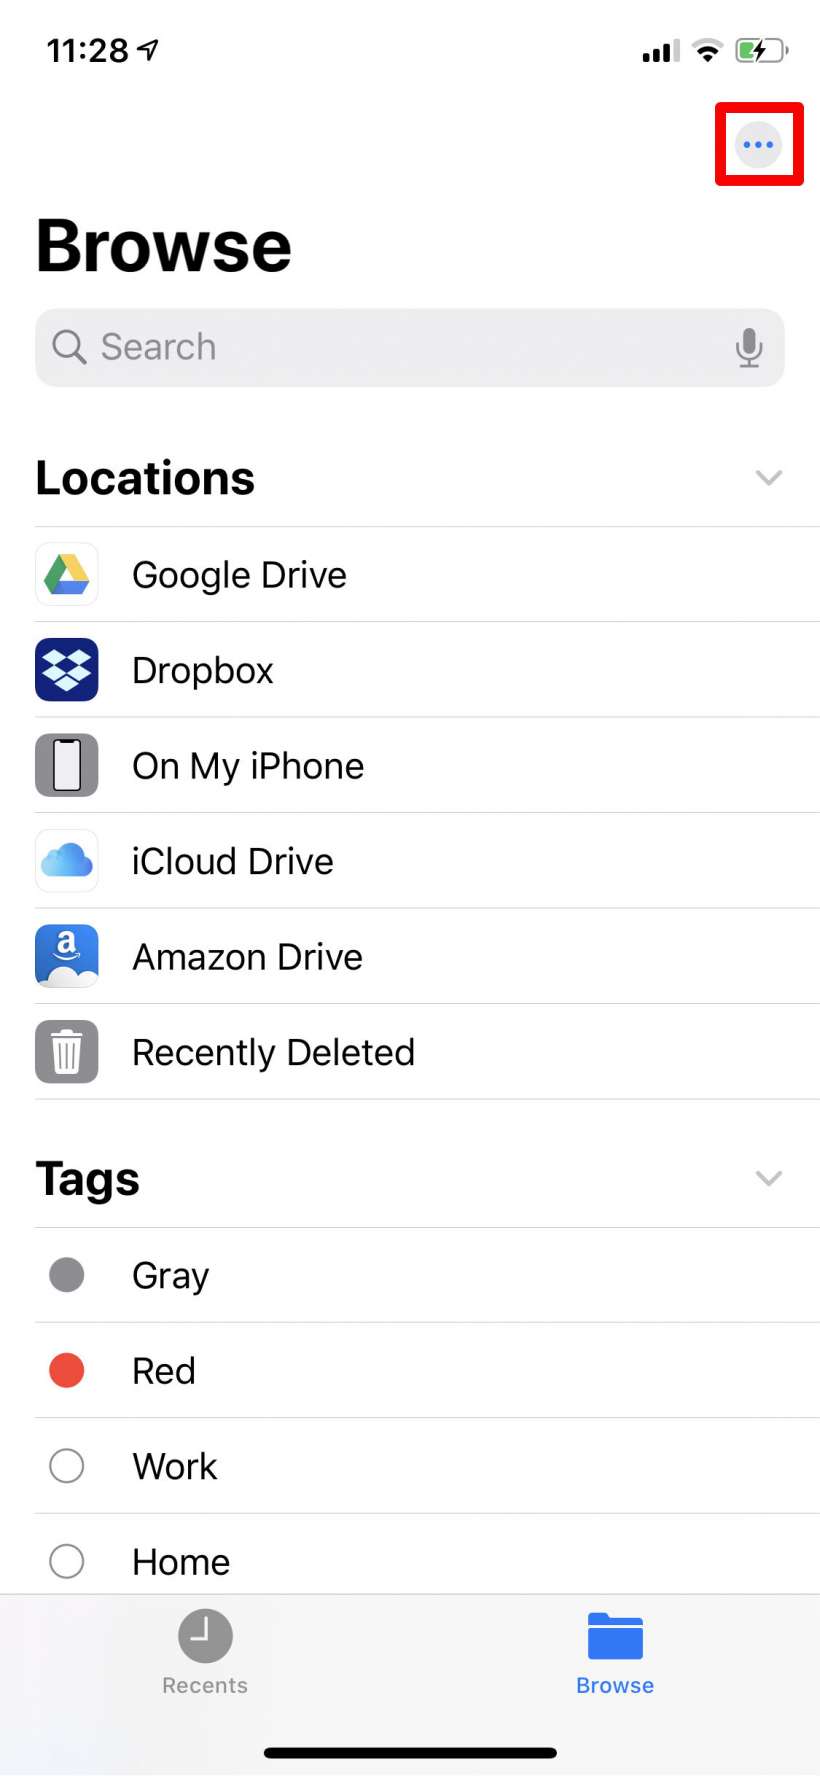
- Open up your Files app on your iPhone or iPad running iOS 13 or later, tap on the Browse tab at the bottom and tap the "..." button in the top right corner. If you don't see it that means you are not at the top level of your directory tree. Some directories like iCloud Drive will have the "..." menu located on the left side near the top, but if you don't see it anywhere just keep navigating to the previous page (the back arrow in the top left corner) until you are in the main Browse page.
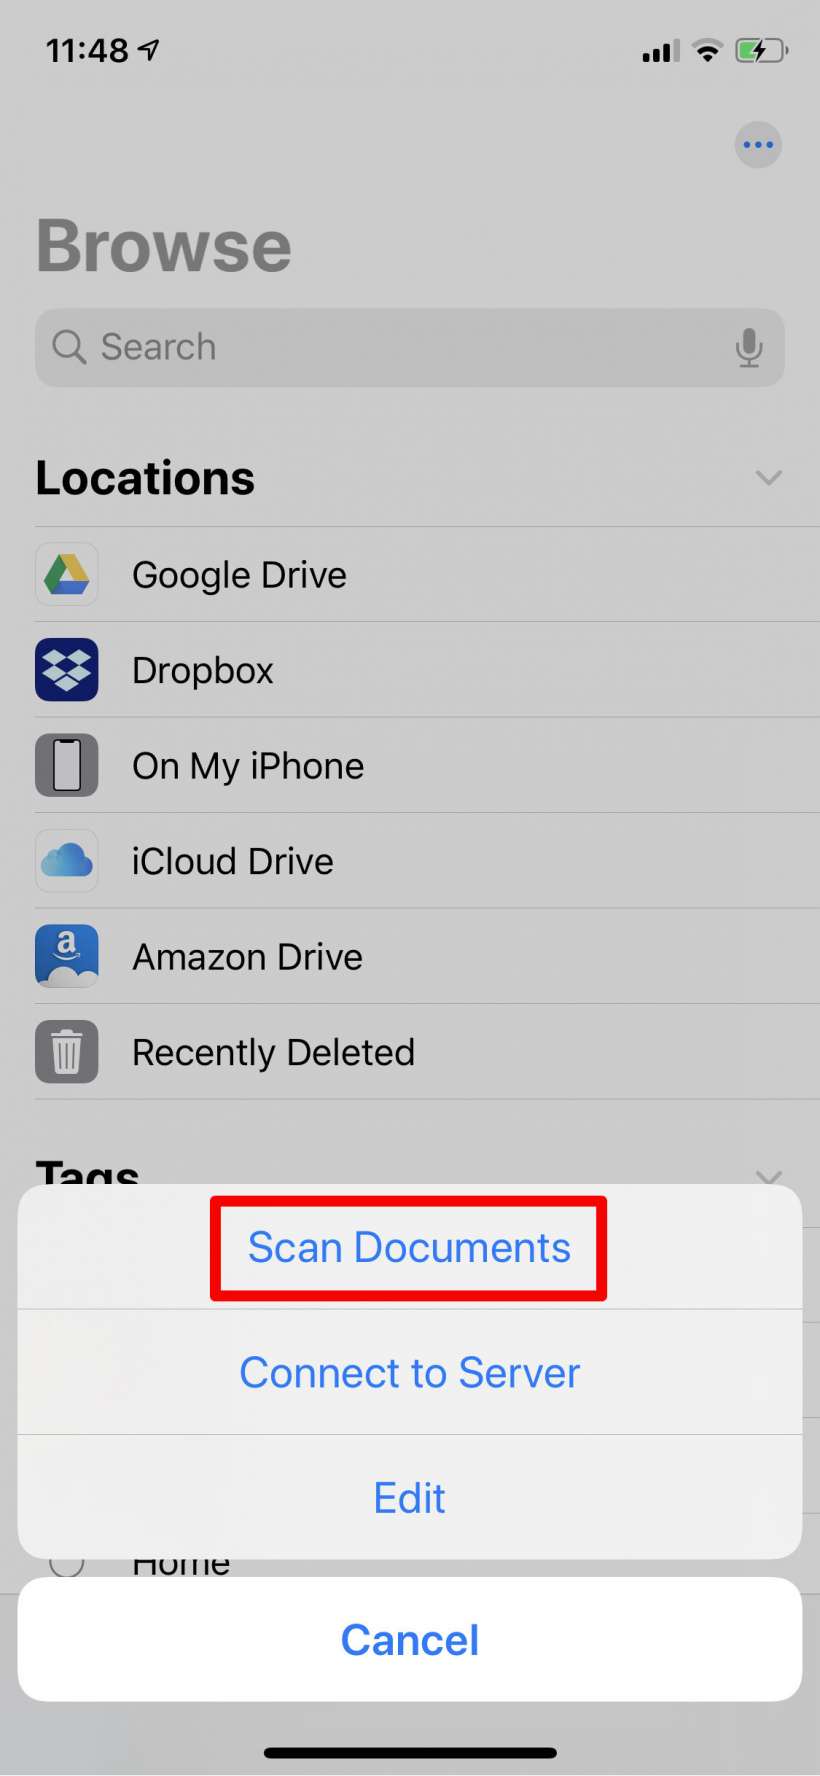
- Tap on Scan Documents.
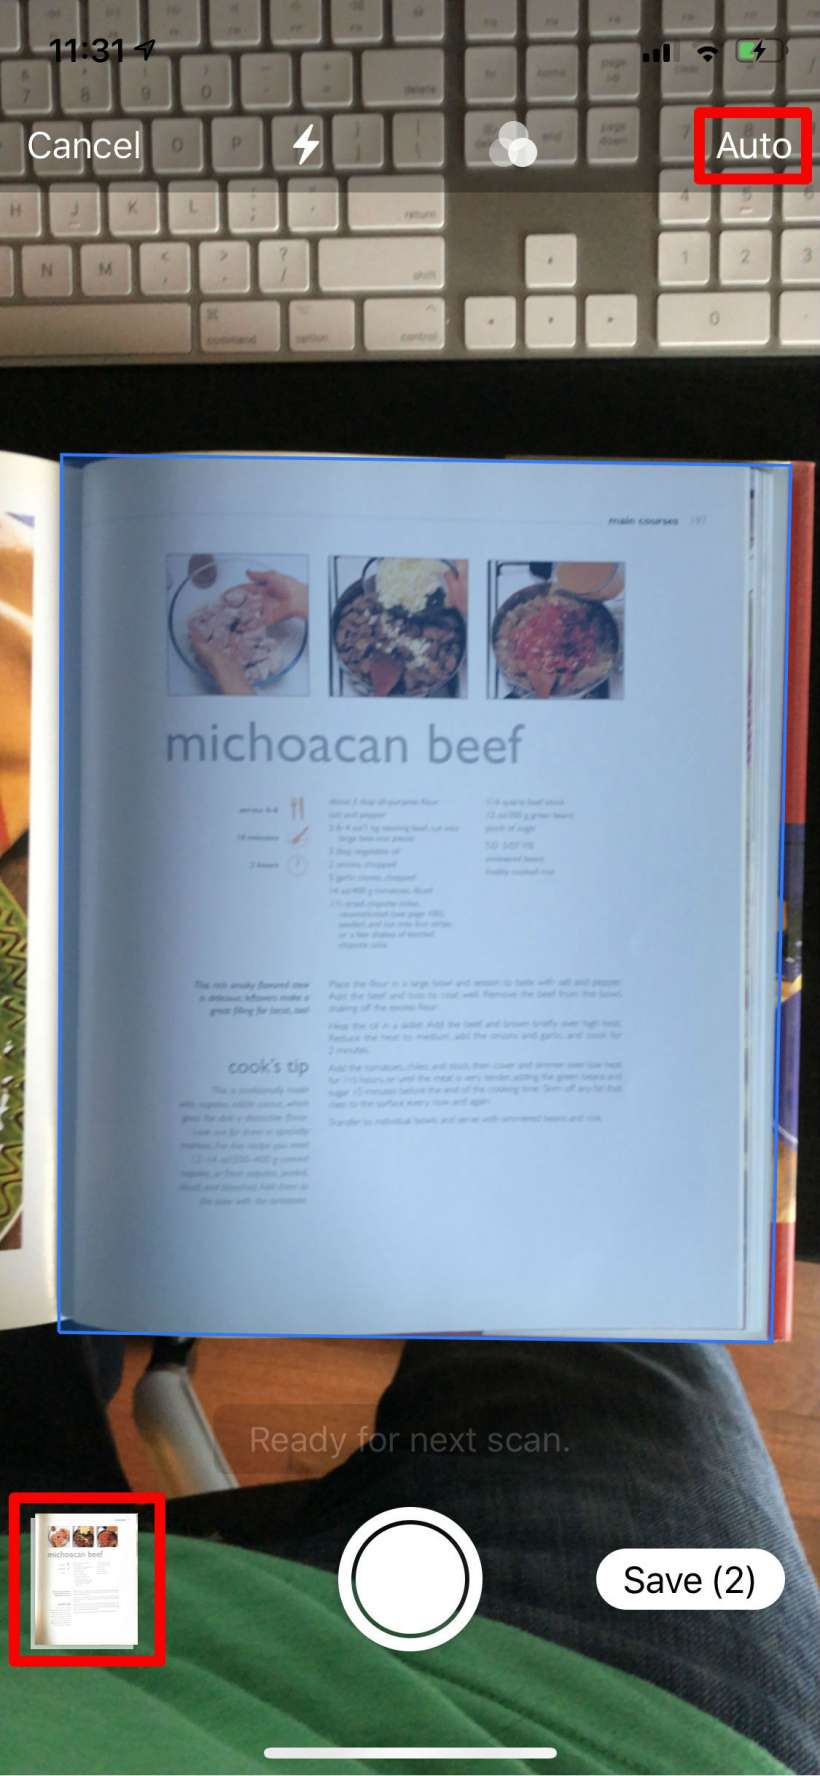
- The scanner will be on auto by default, so just move your camera closer or farther until you have your document in focus. A blue square will appear on the part to be scanned. Hold it steady and then it will automatically scan. If you are having trouble you can tap on "Auto" at the top to change it to manual. In manual you will be able to drag the blue square to cover what you want to scan, then tap the shutter button to take the scan. After the scan has taken, tap on the thumbnail in the bottom left to review it.
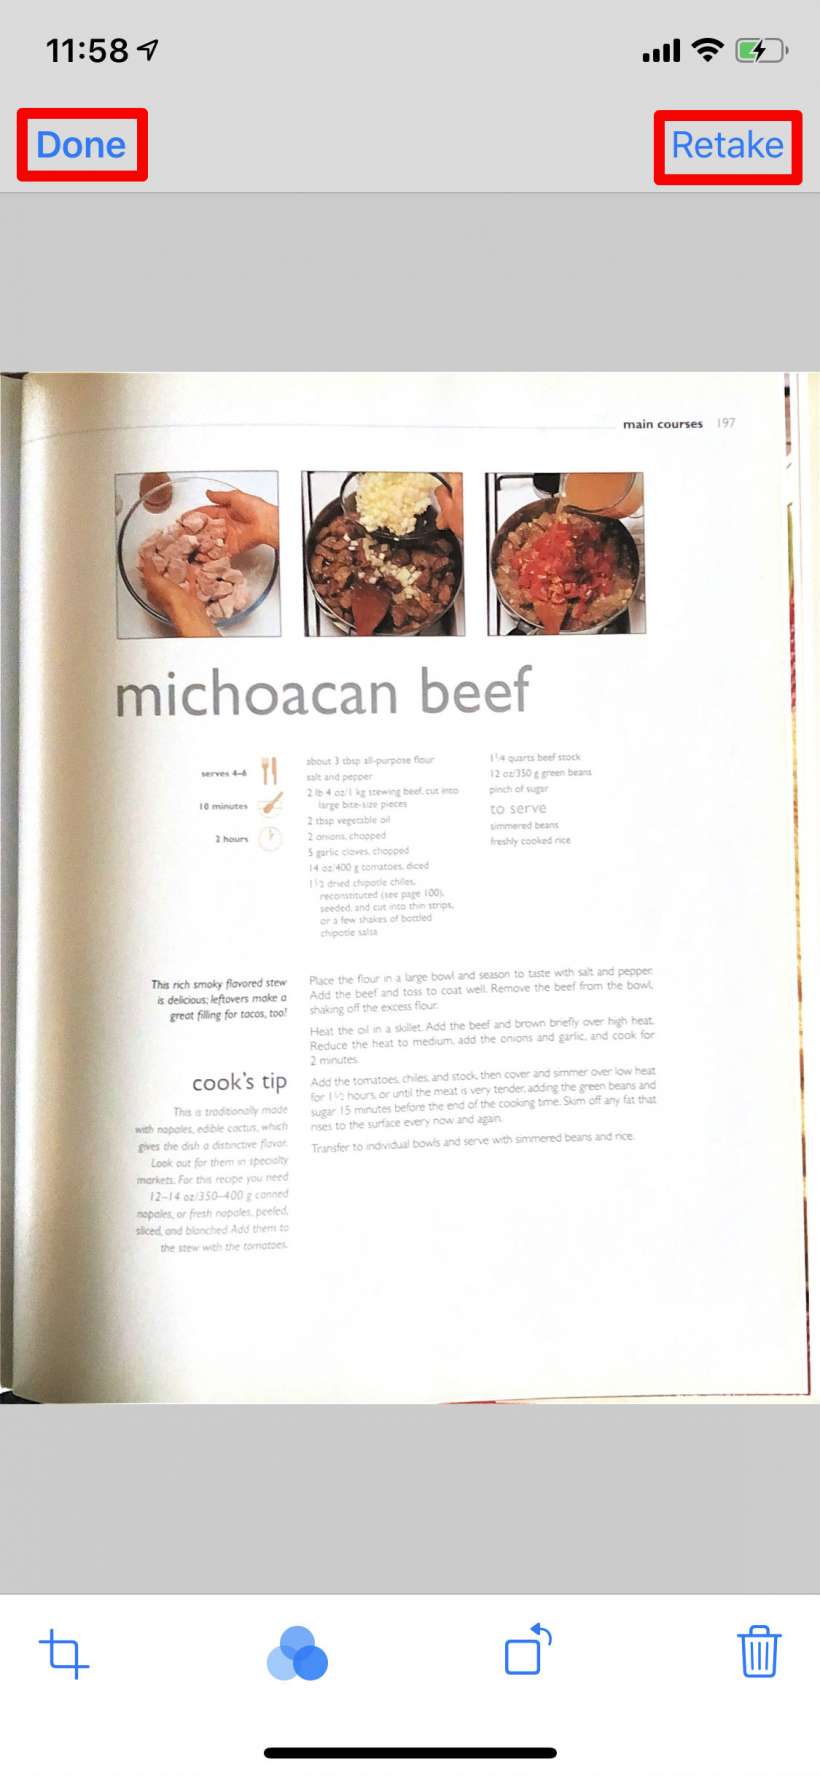
- If you are happy with it tap Done, otherwise tap Retake and try again.
- Tap Save in the bottom right.
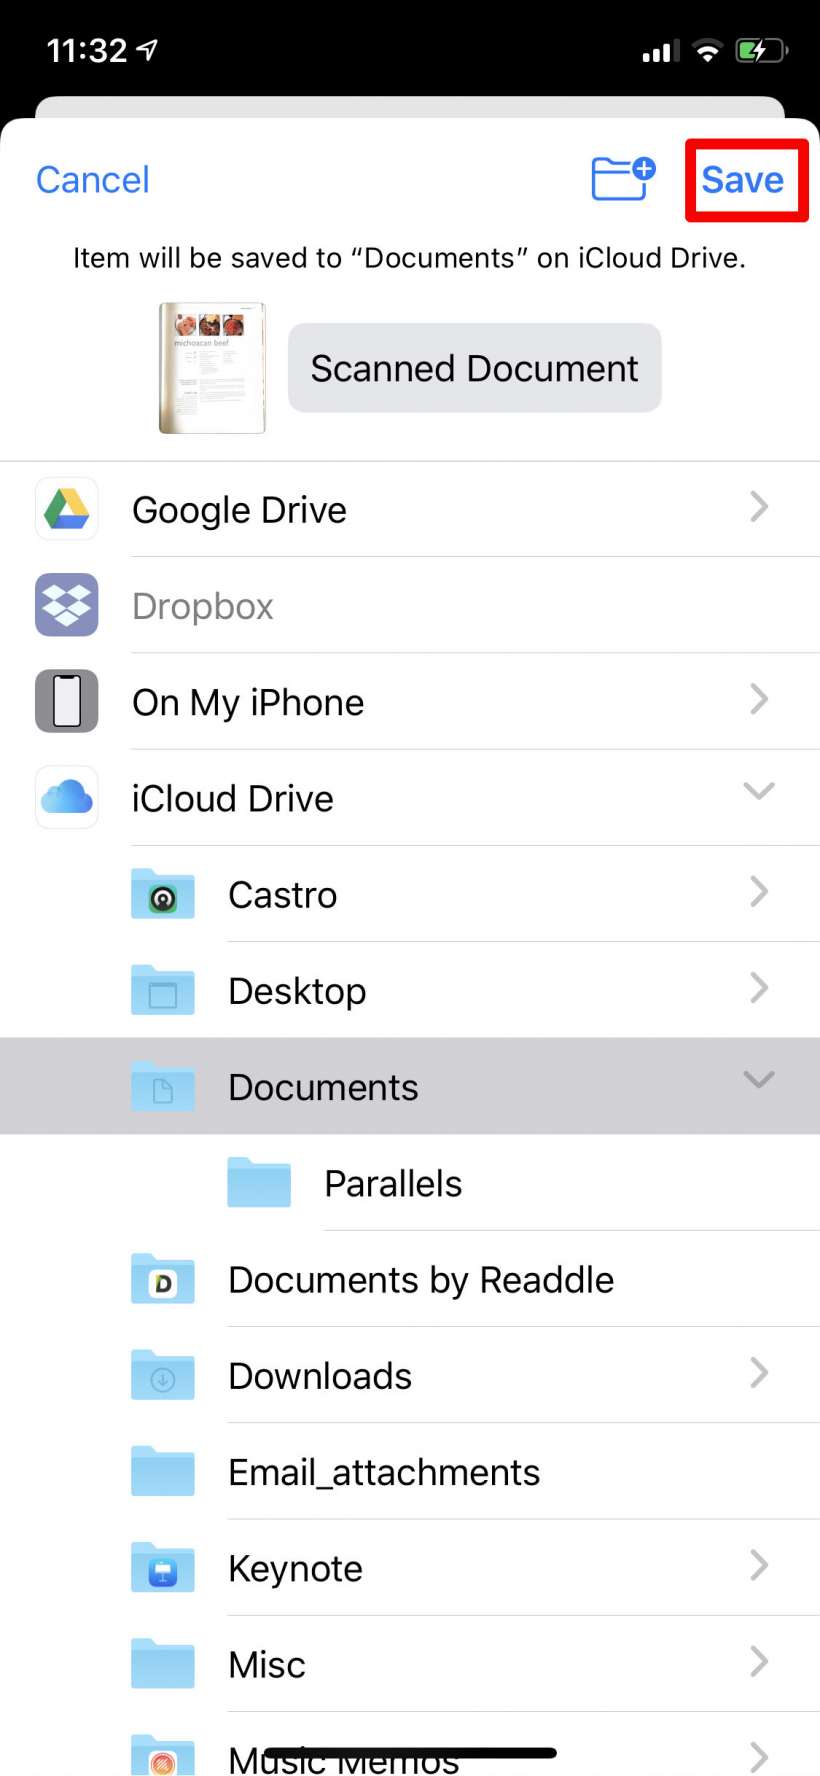
- Now just choose where you want to save it and tap Save in the top right. That's all there is to it.
