Submitted by Jon Reed on
Among the many new features introduced to iOS is the ability to record your iPhone or iPad's screen, surely a welcome addition for gamers who want to share strategies (or boast of their accomplishments) and for iOS tutorial writers, including yours truly. While you could always do this using QuickTime on a Mac, the Screen Recording feature makes it a lot less complicated. Here's a brief example:
And here's how to do it:
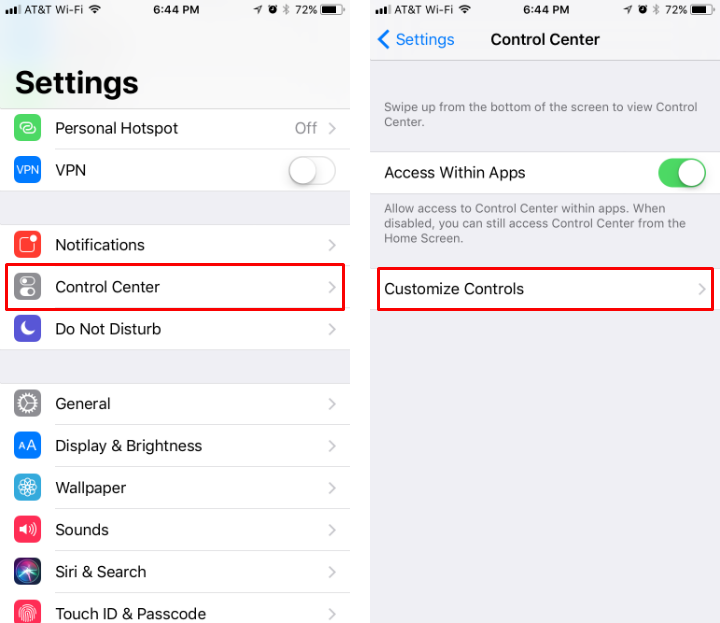
- Add the Screen Recording feature to your Control Panel. Head to Settings -> Control Panel and tap on Customize Controls.
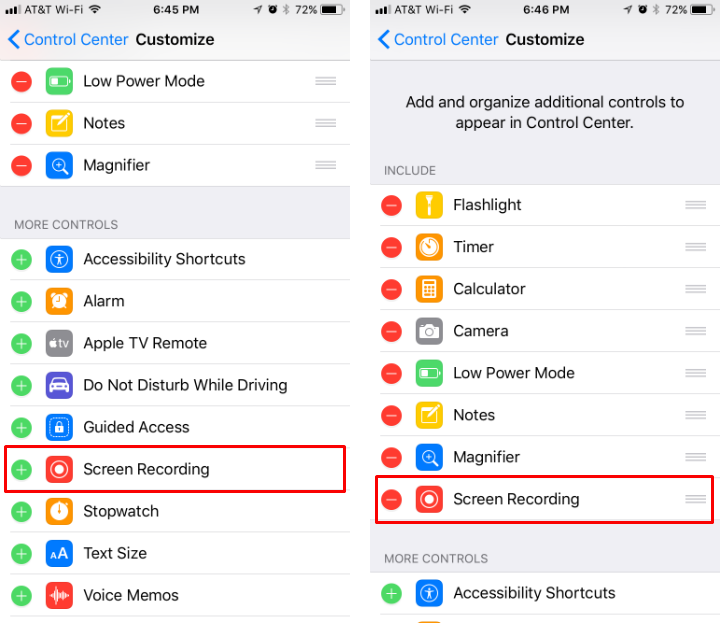
- Scroll down and find Screen Recording, then tap the + sign next to it to add it to your Control Panel.
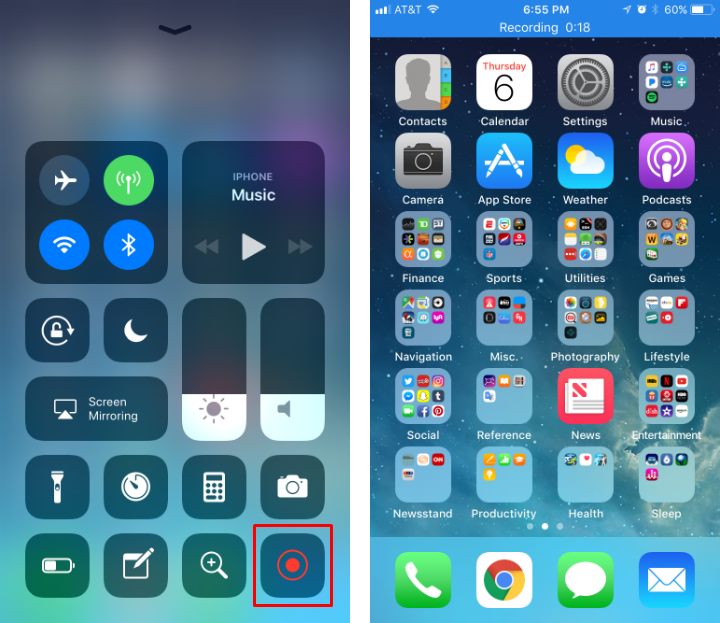
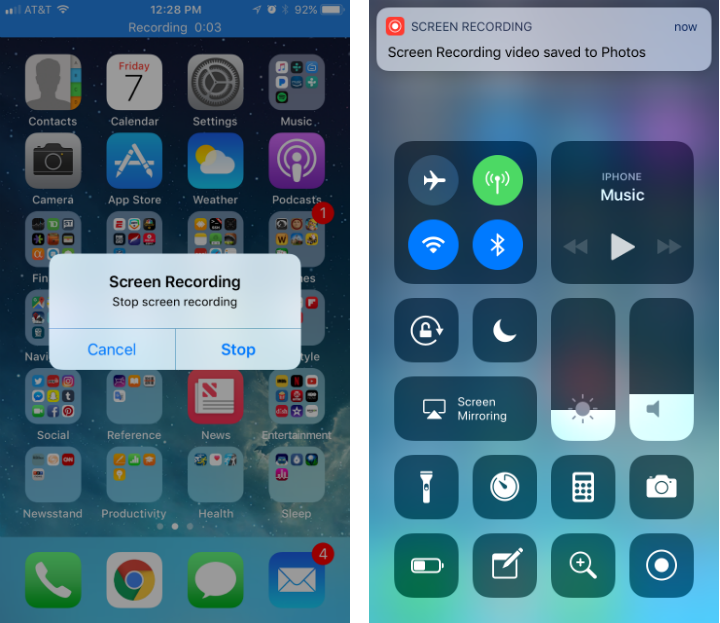
- Bring up your Control Panel by swiping up from the bottom of your screen. Activate Screen Recording by tapping on its icon. This will start the recording and when you close the Control Panel you will see a status bar at the top of the screen showing that recording is in progress and its current duration.
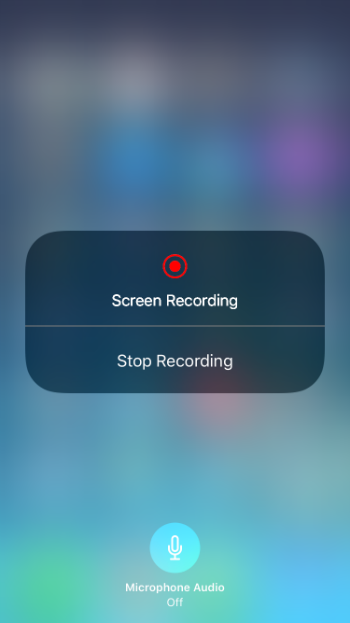
- You can also long press the recording icon to bring up an option to turn on audio. This will turn on the mic in case you want to narrate your video. Any sounds from apps will be captured regardless of whether the mic is on, as long as you have sound on (i.e. your ringer is on).
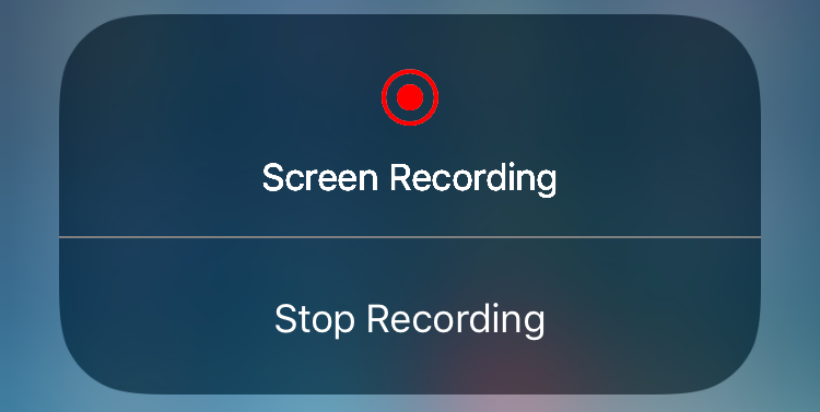
- You can stop recording by tapping the bar at the top of the screen, then tapping Stop Recording. You will then be notified that the video has been saved to your Photos library. You can access it there and edit and share it as you would any other video.
tags:
Comments
Hovlik Doutt replied on Permalink
Thank you for these instructions, really helpful!! The Quicktime recording itself is near real-time, but there is some noticeable lag between performing an action on my iPhone and seeing the action occur in the QuickTime window. Currently, I'm using a desktop app call Acethinker iPhone screen recorder that mirrors my iPhone screen to the computer and use its screen recording function to make videos. It's not that direct, but it works. Share it here as an alternative method.