Submitted by Jon Reed on
Shortcuts is Apple's new version of Workflow that launched with iOS 12. It is a productivity tool that does what its name implies - each shortcut is basically a program or 'workflow' that runs through a set of steps to produce a desired result. For example, Home ETA is a navigation shortcut that uses Maps and Messages to send someone (pre-determined by you) your arrival time with a single tap. There are hundreds of pre-made shortcuts in the app's gallery, but one of the best features of Shortcuts is that you can edit existing ones to fit your needs or you can write your own. In fact, many people write their own shortcuts and eagerly share them on third party sites like Reddit, Sharecuts and MacStories.
To give you an idea of how to write your own shortcut, the following example will go through each step of creating a shortcut that will take the current date and then display photos from your albums taken on that date in previous years. Here's how to write your own shortcut on iPhone or iPad:
TL;DR If you are viewing this on your iPhone, you can download the shortcut here if you aren't interested in the programming.
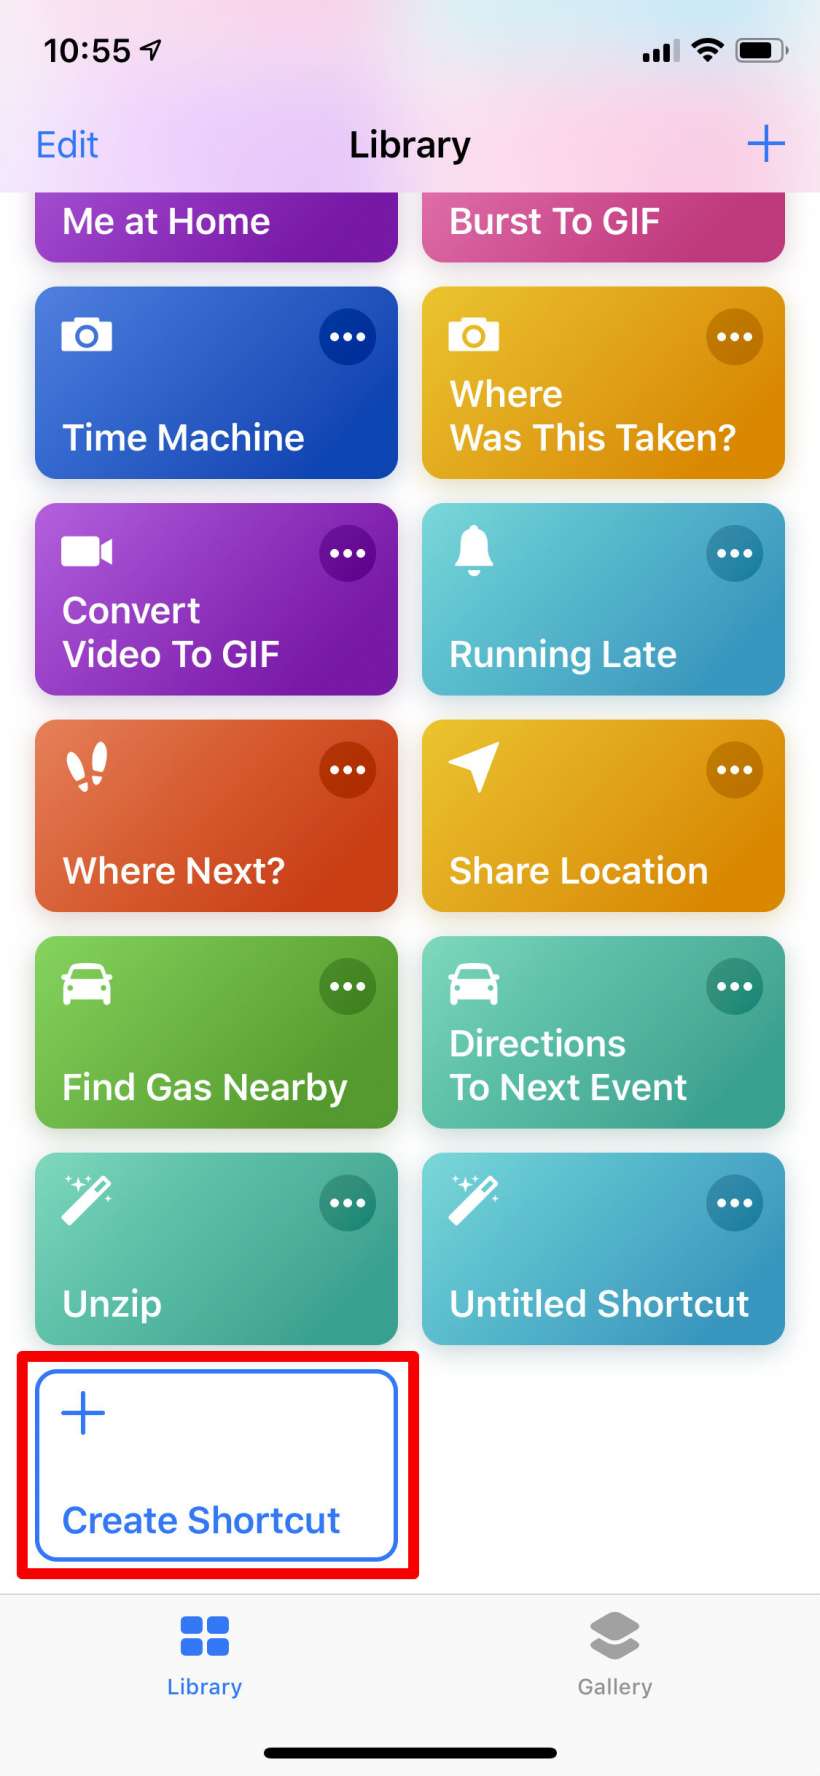
- Open your Shortcuts app and select Create Shortcut from the Library section.
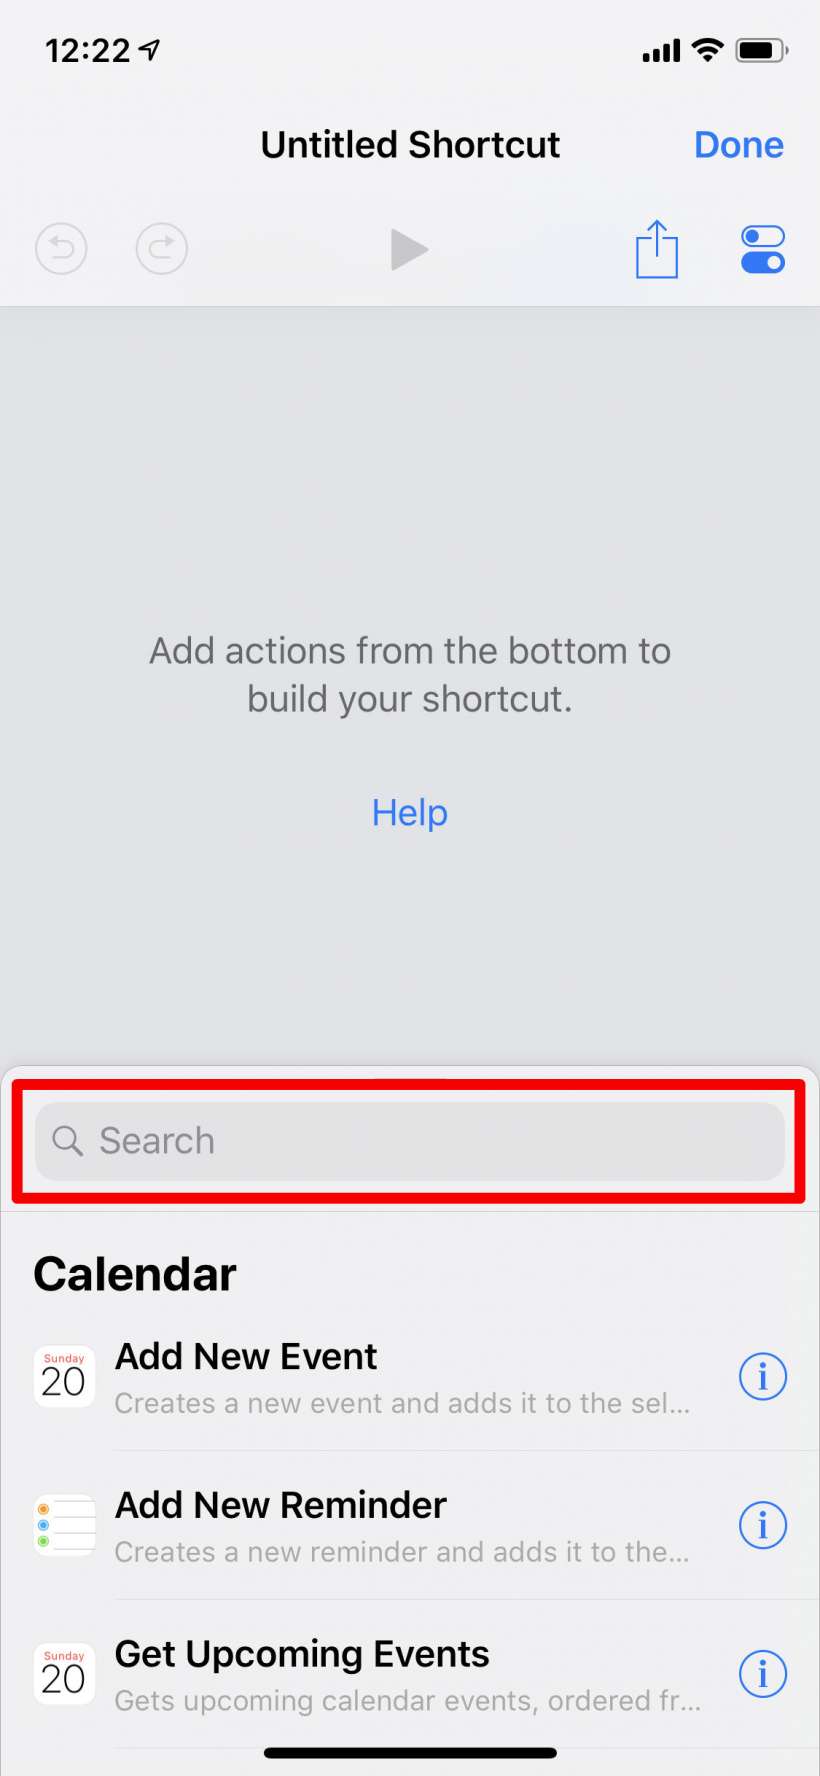
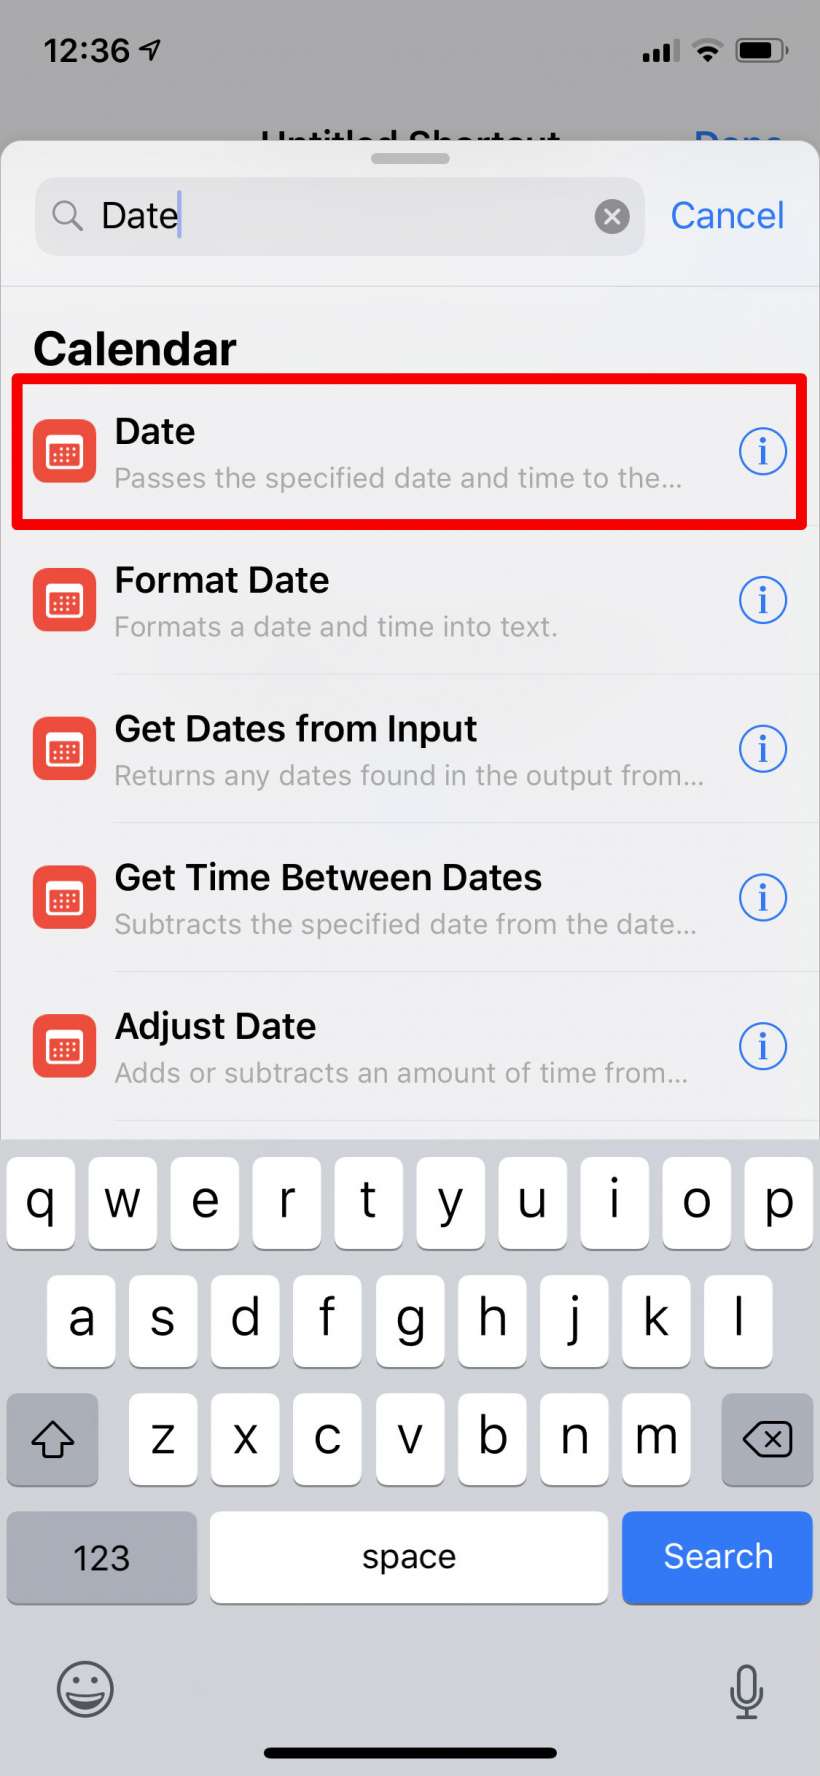
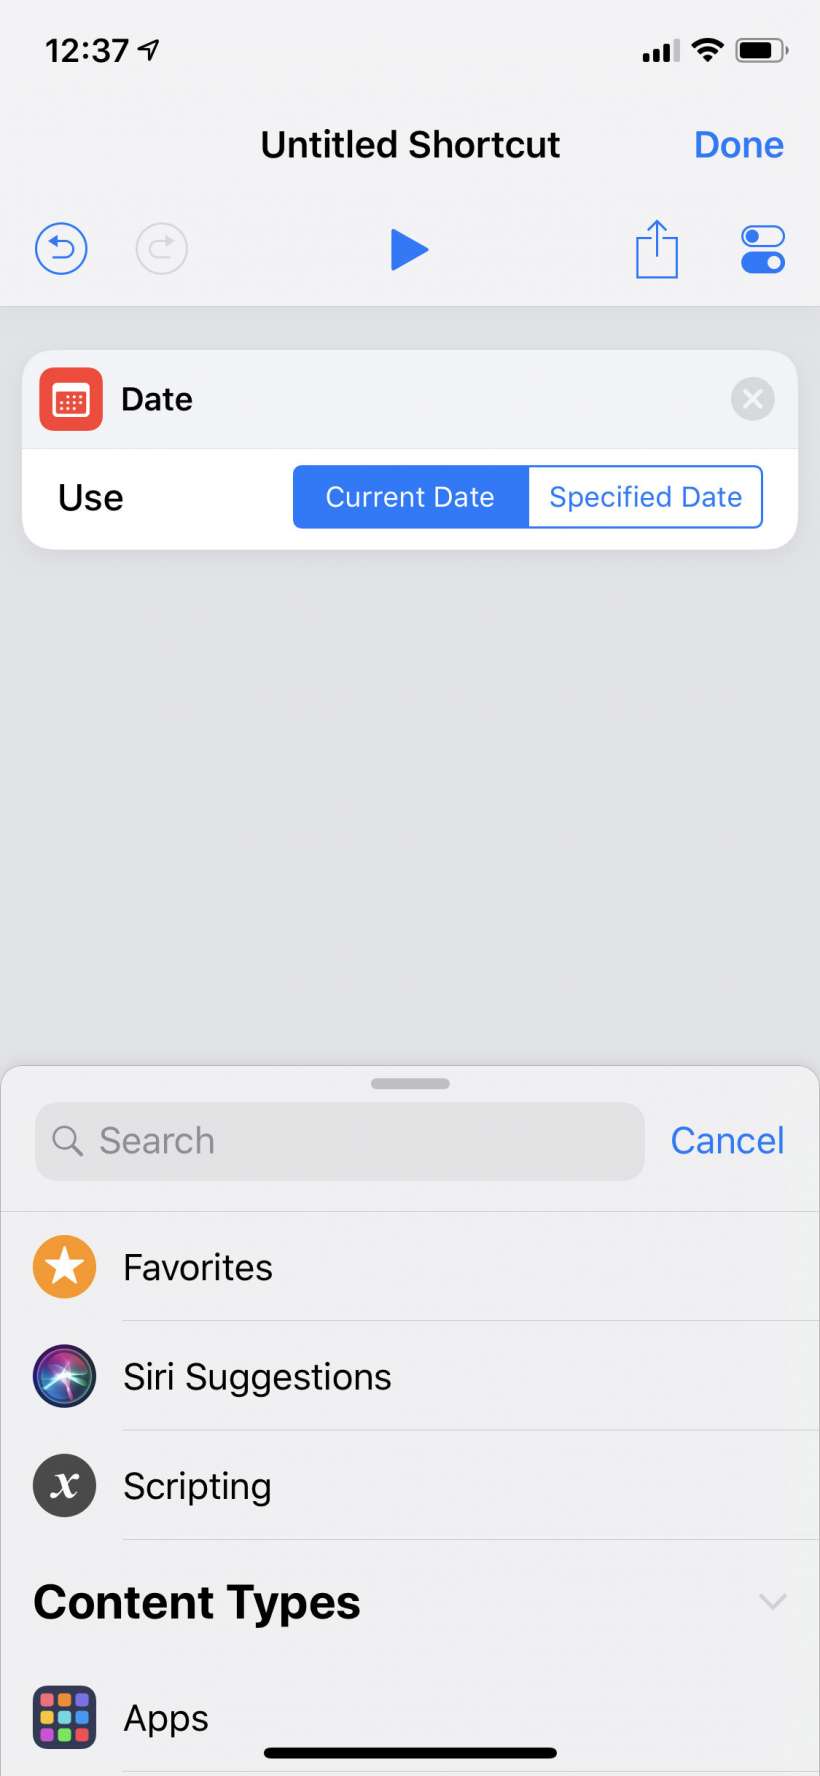
- Shortcuts has a library of procedures or "actions" that you will use whenever you write a shortcut. The first thing we want to do is get the current date, so tap on the search bar, search for "date" and tap on the Date action when it pops up.
- Now you see that we have Date as the first action in our program. It is set to get the current date by default which is what we want so we can leave it alone.
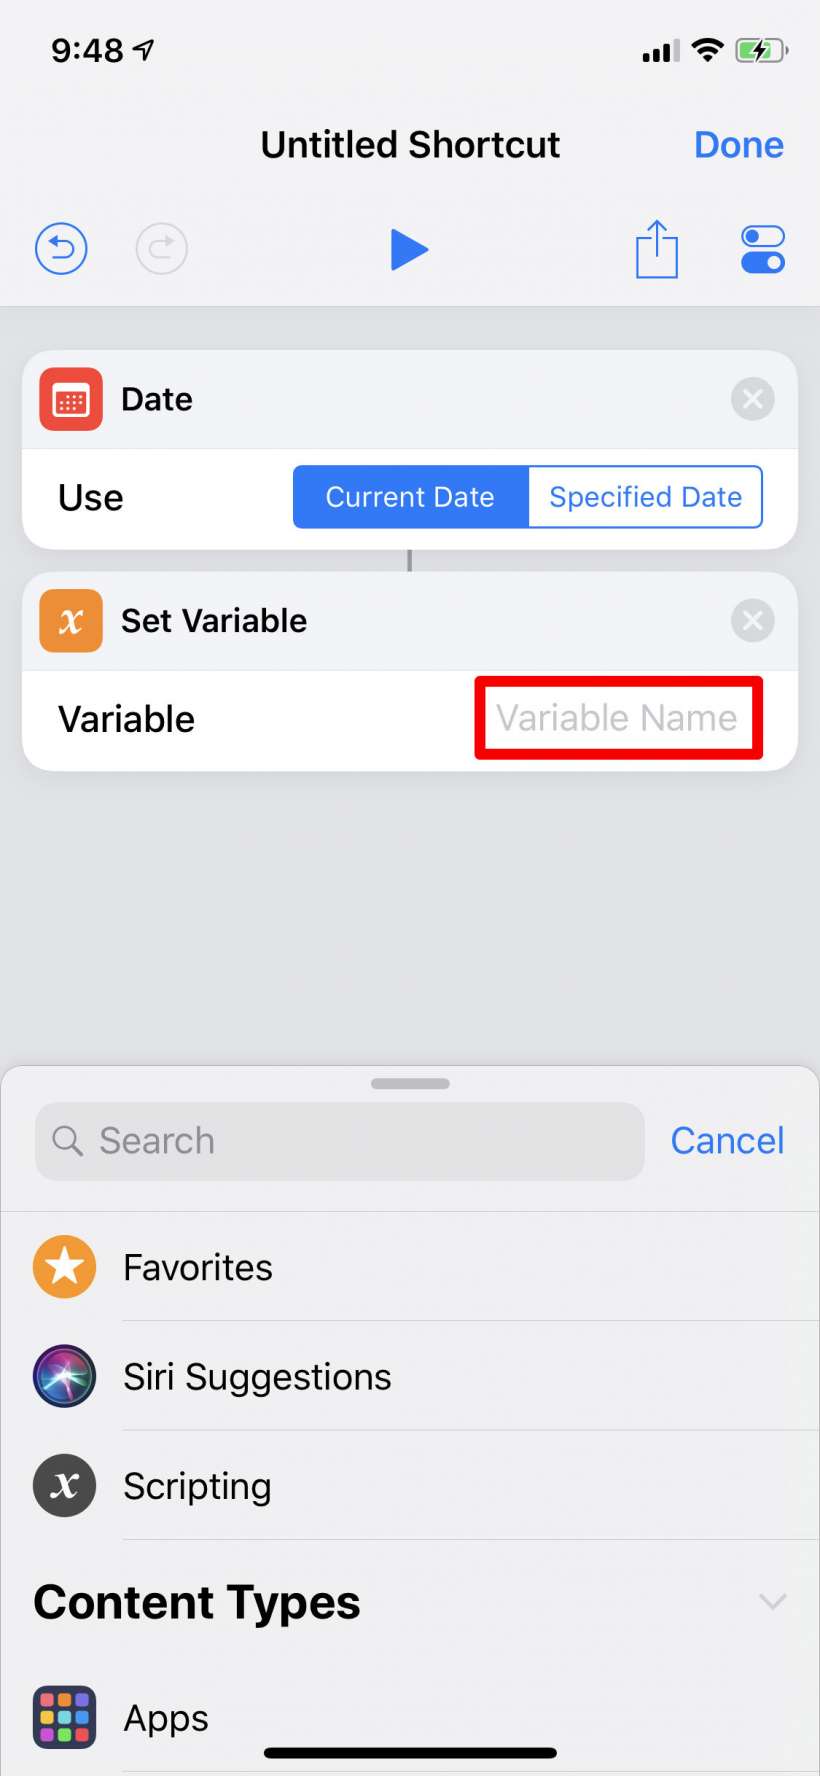
- Now we want to store the date in a variable (programming term for a data element that is likely to change) that we can manipulate. Search for "variable" and select the Set Variable action. Tap on "Variable Name" to enter your own name, we'll call it Date.
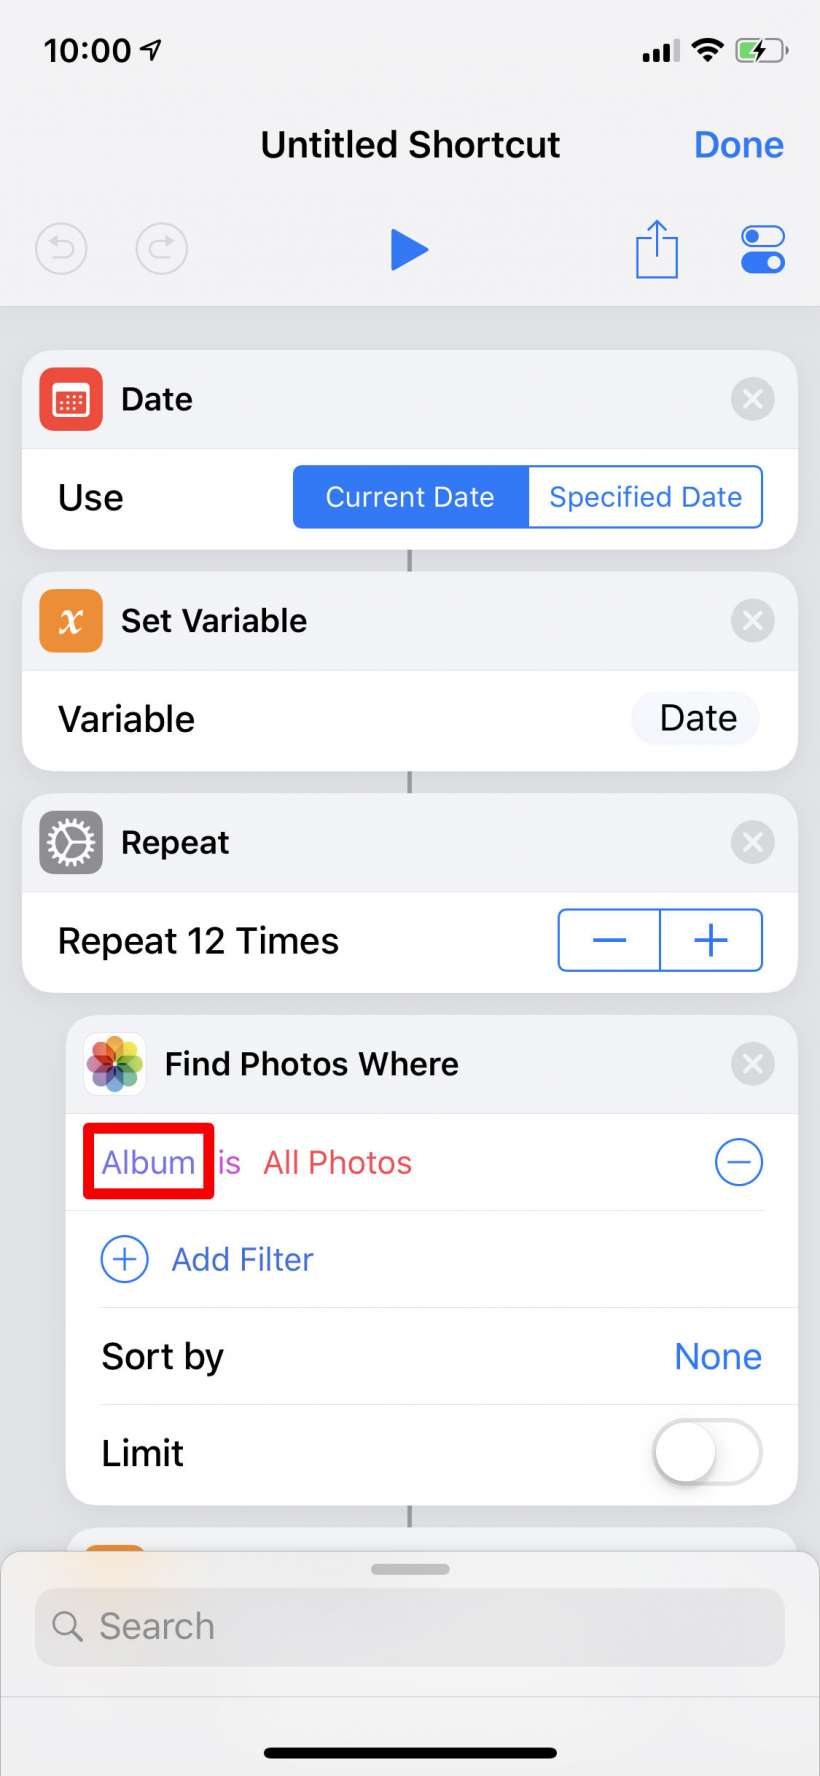
- Now search for and add the "Repeat" action. We need this because we want to change the date and search for photos with each new date. Tap the "+" button to repeat 12 times (I chose 12 simply because it covers all of the years since the first iPhone, thus will include my oldest photos taken with an iPhone).
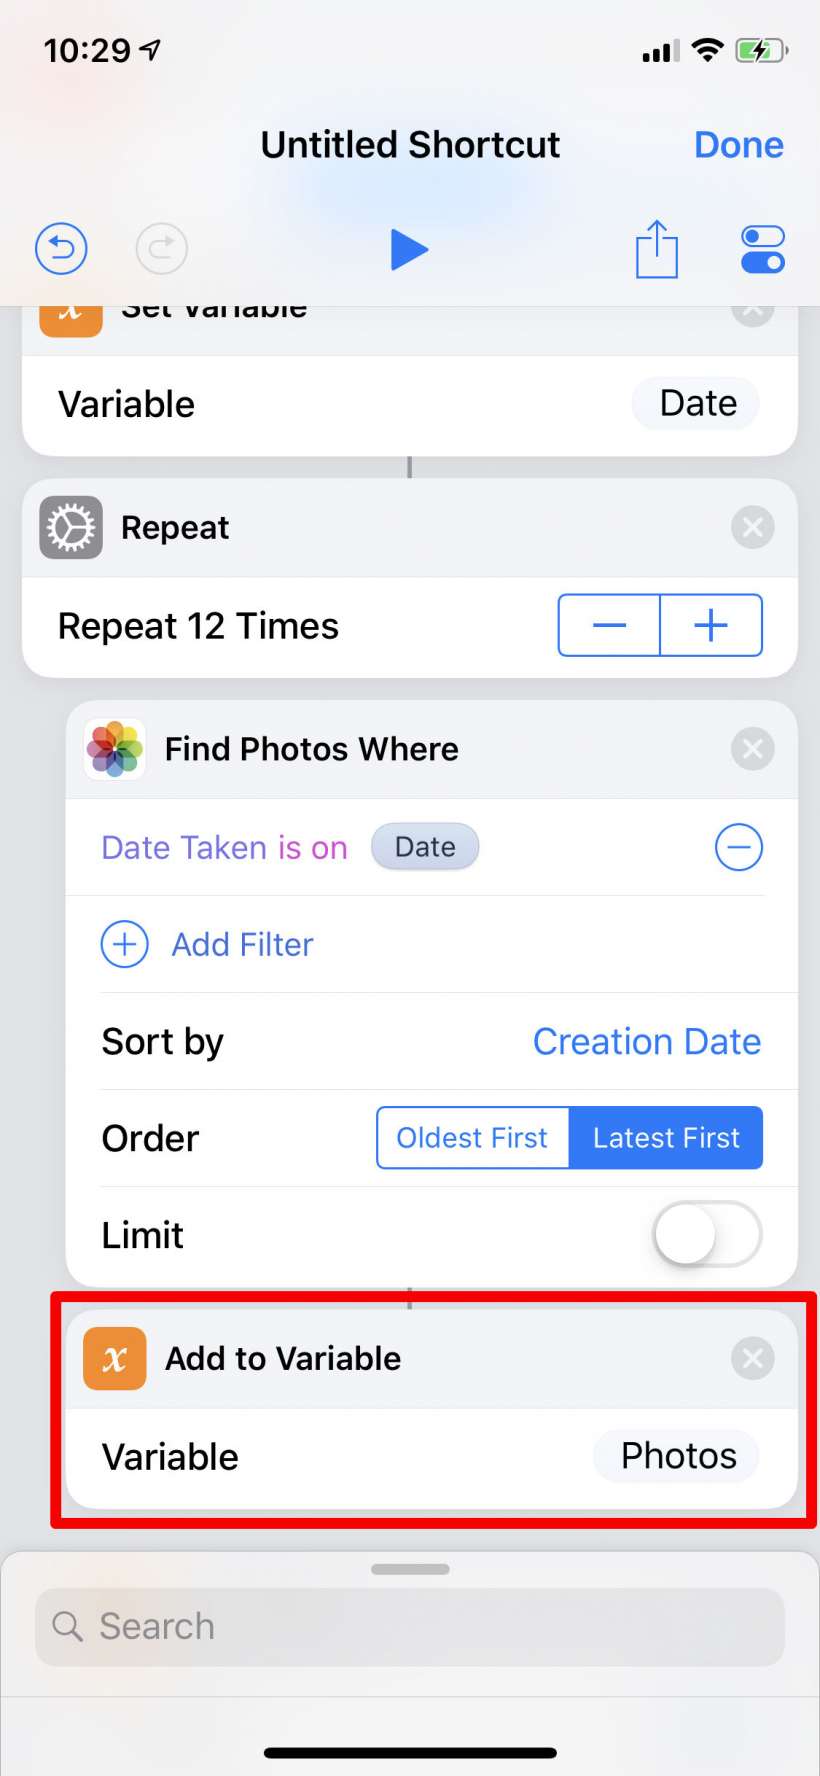
- Now we want to add some actions to the body of the Repeat loop. Search for and add the "Find Photos" action. Once you have added it, tap on "Add Filter."
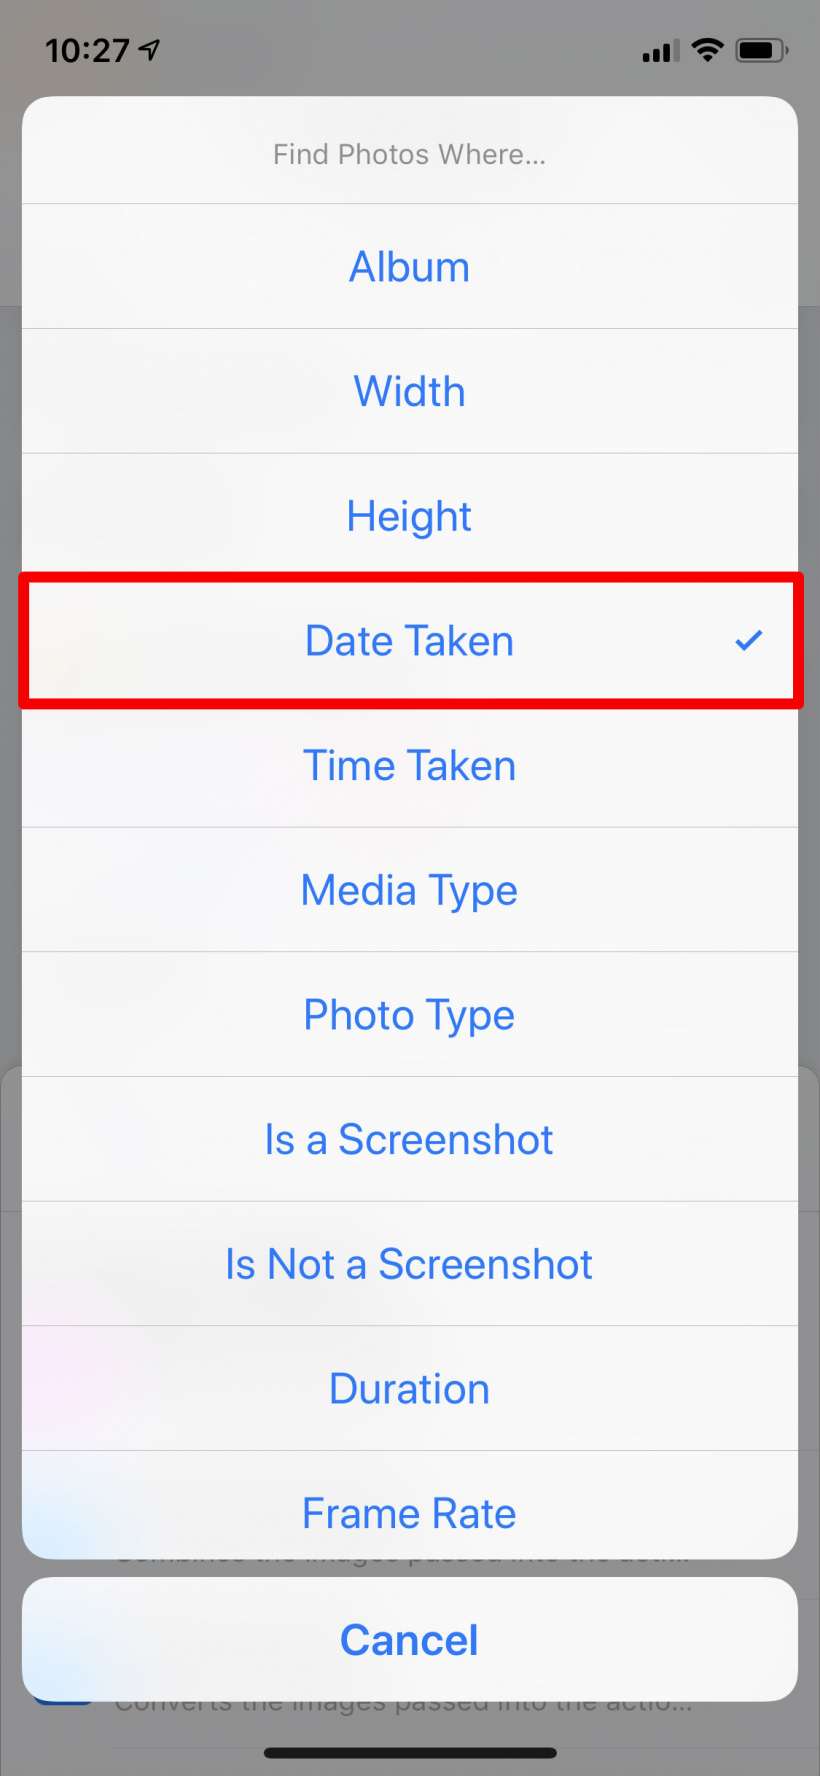
- Tap on "Album" and change it to "Date Taken."
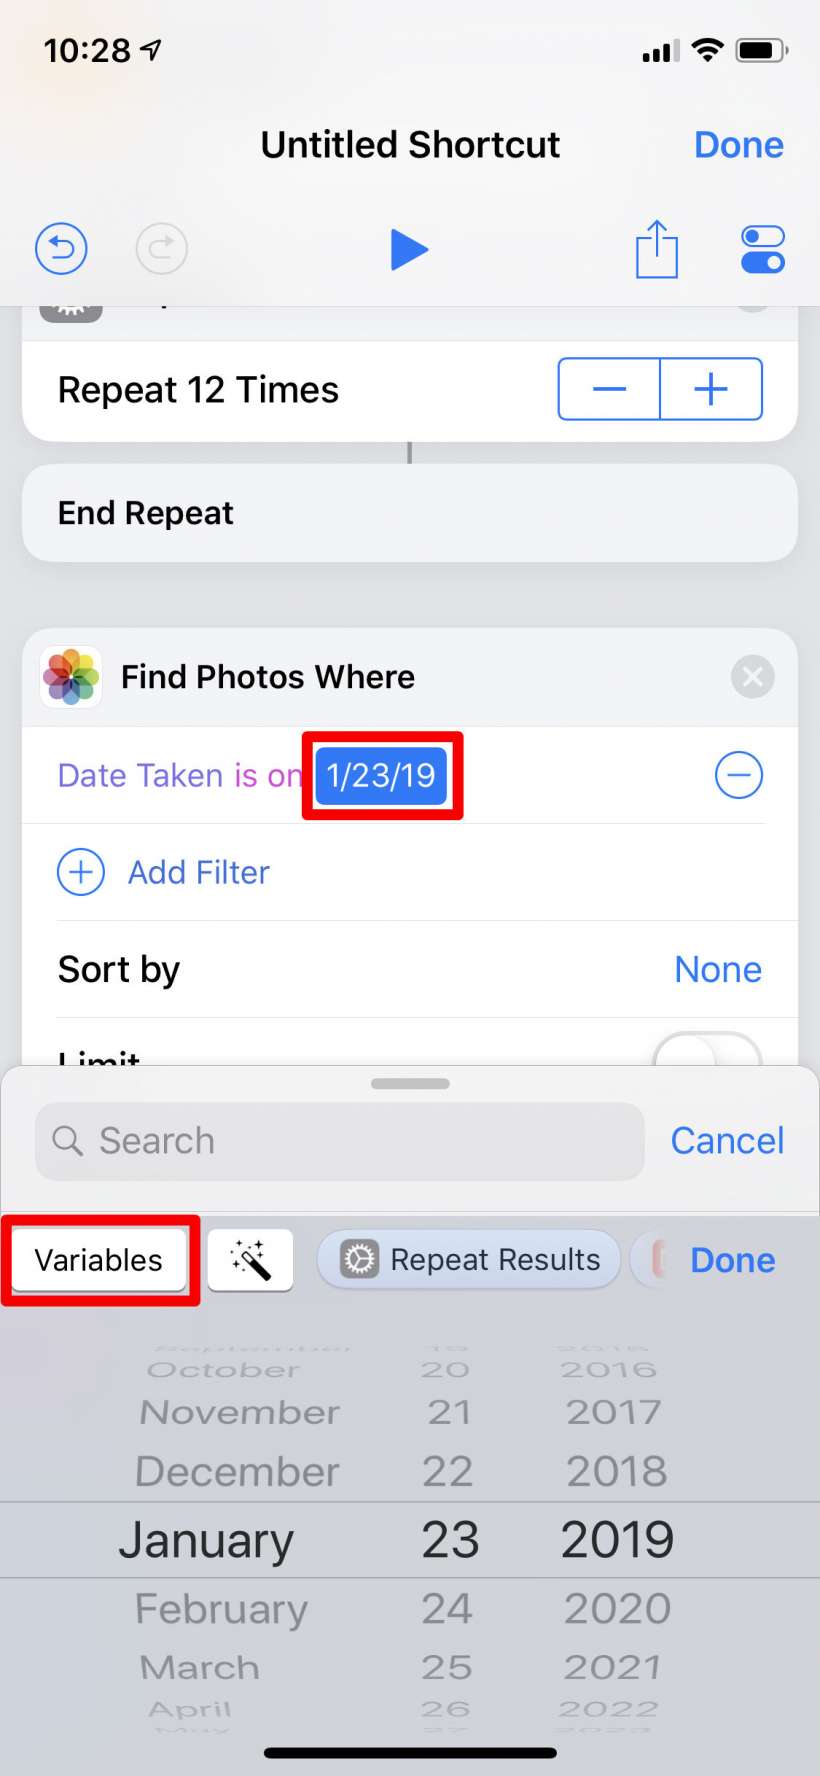
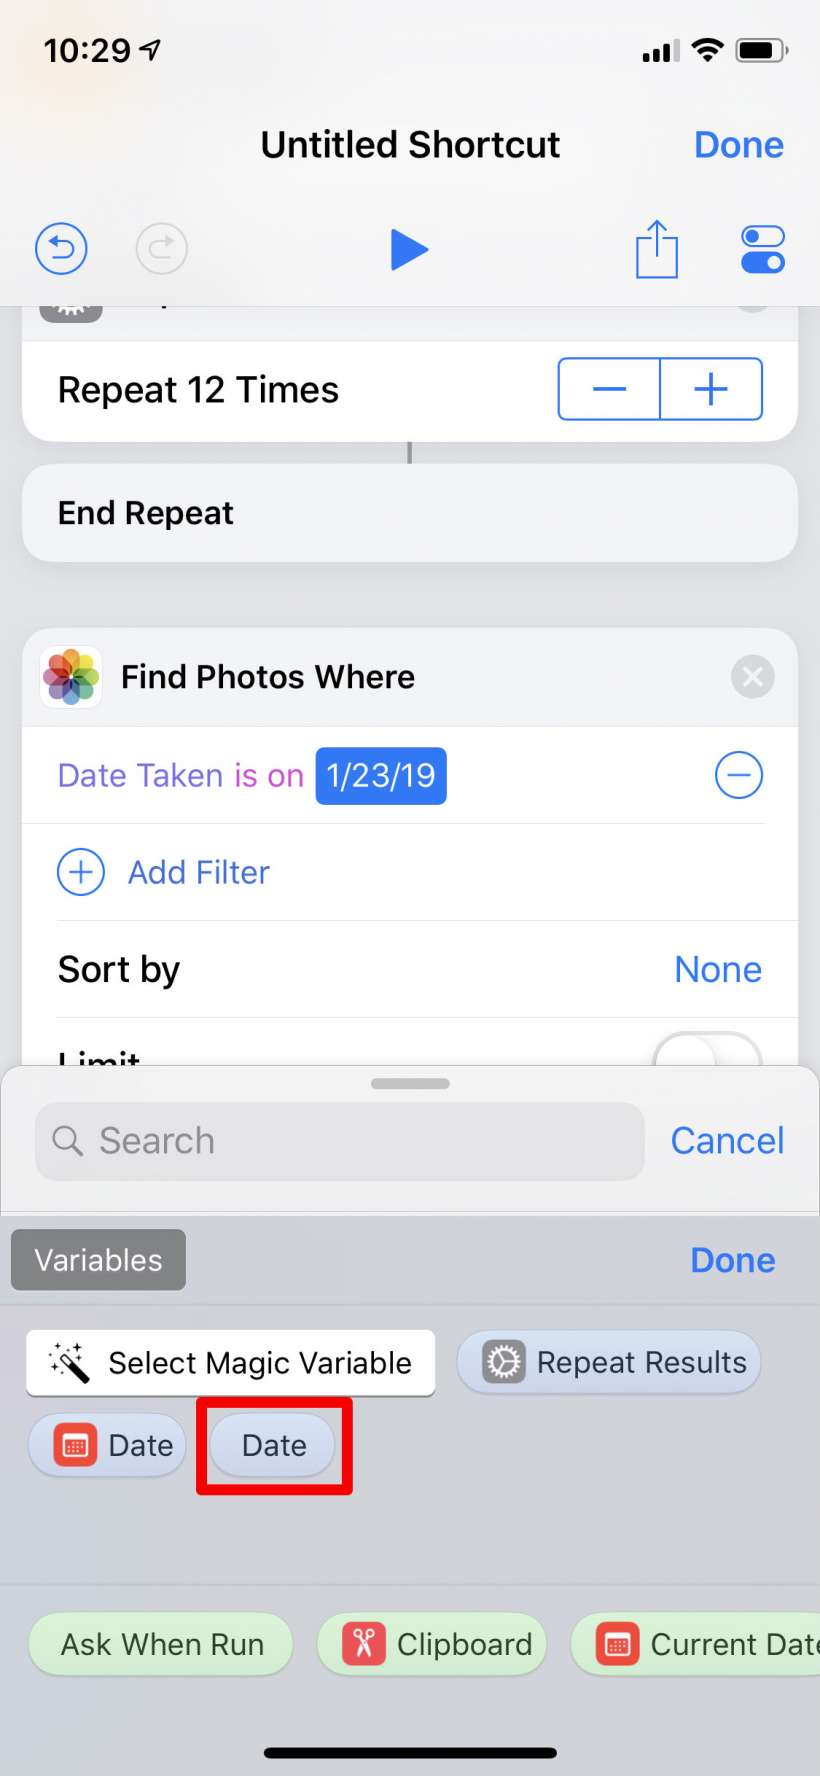
- Now tap on the date and tap on "Variables." Select the Date variable that we created (not the one with the little calendar icon next to it).
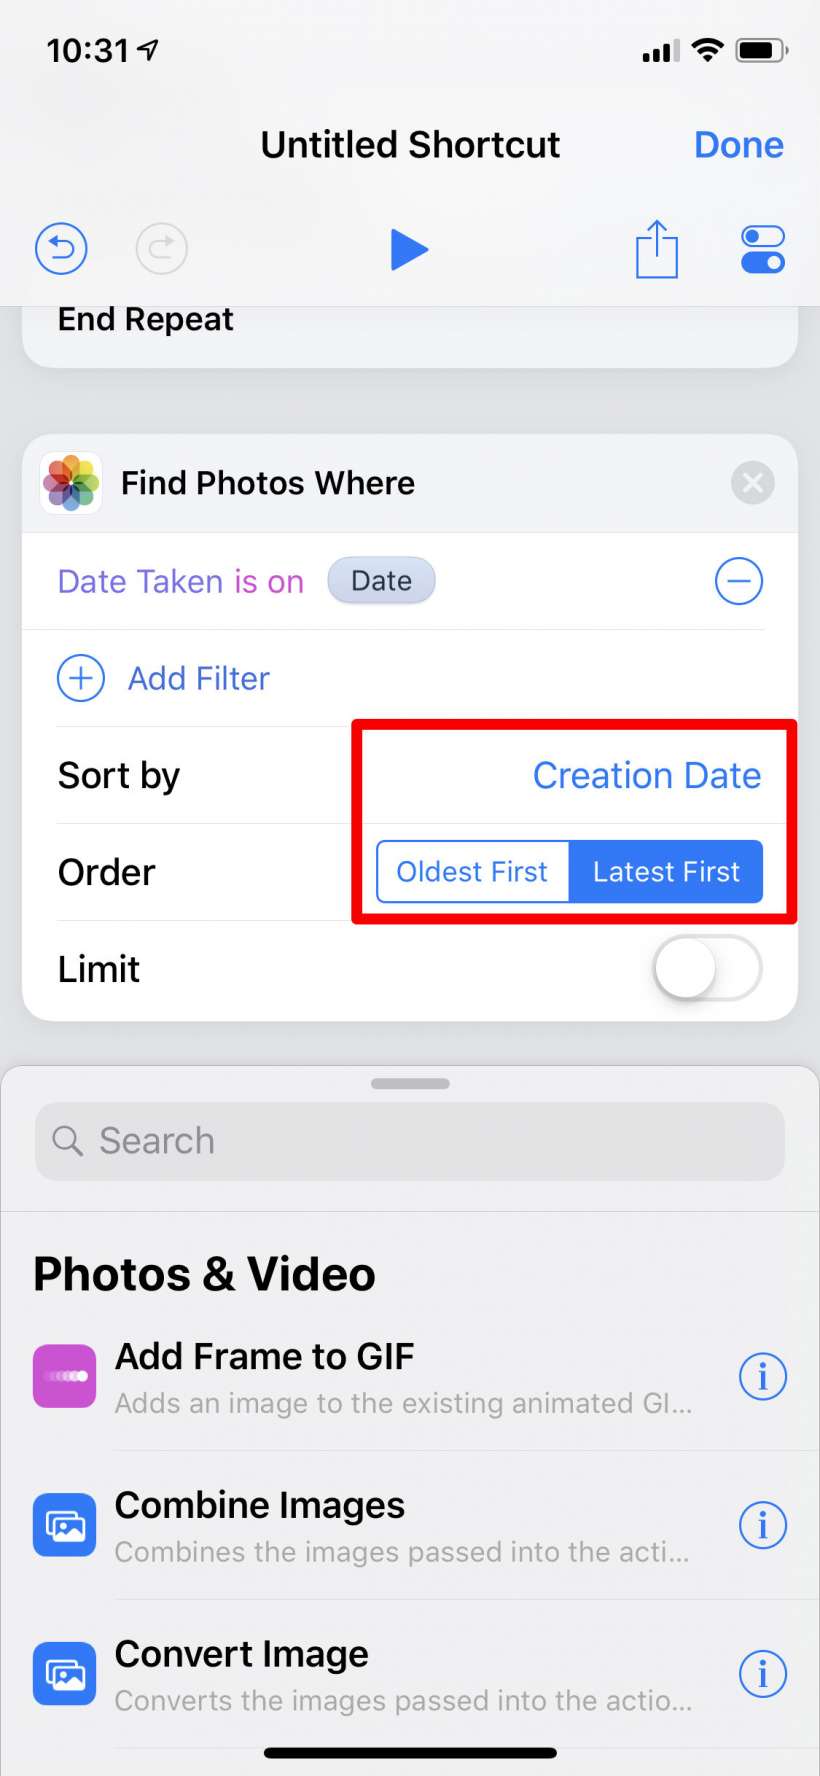
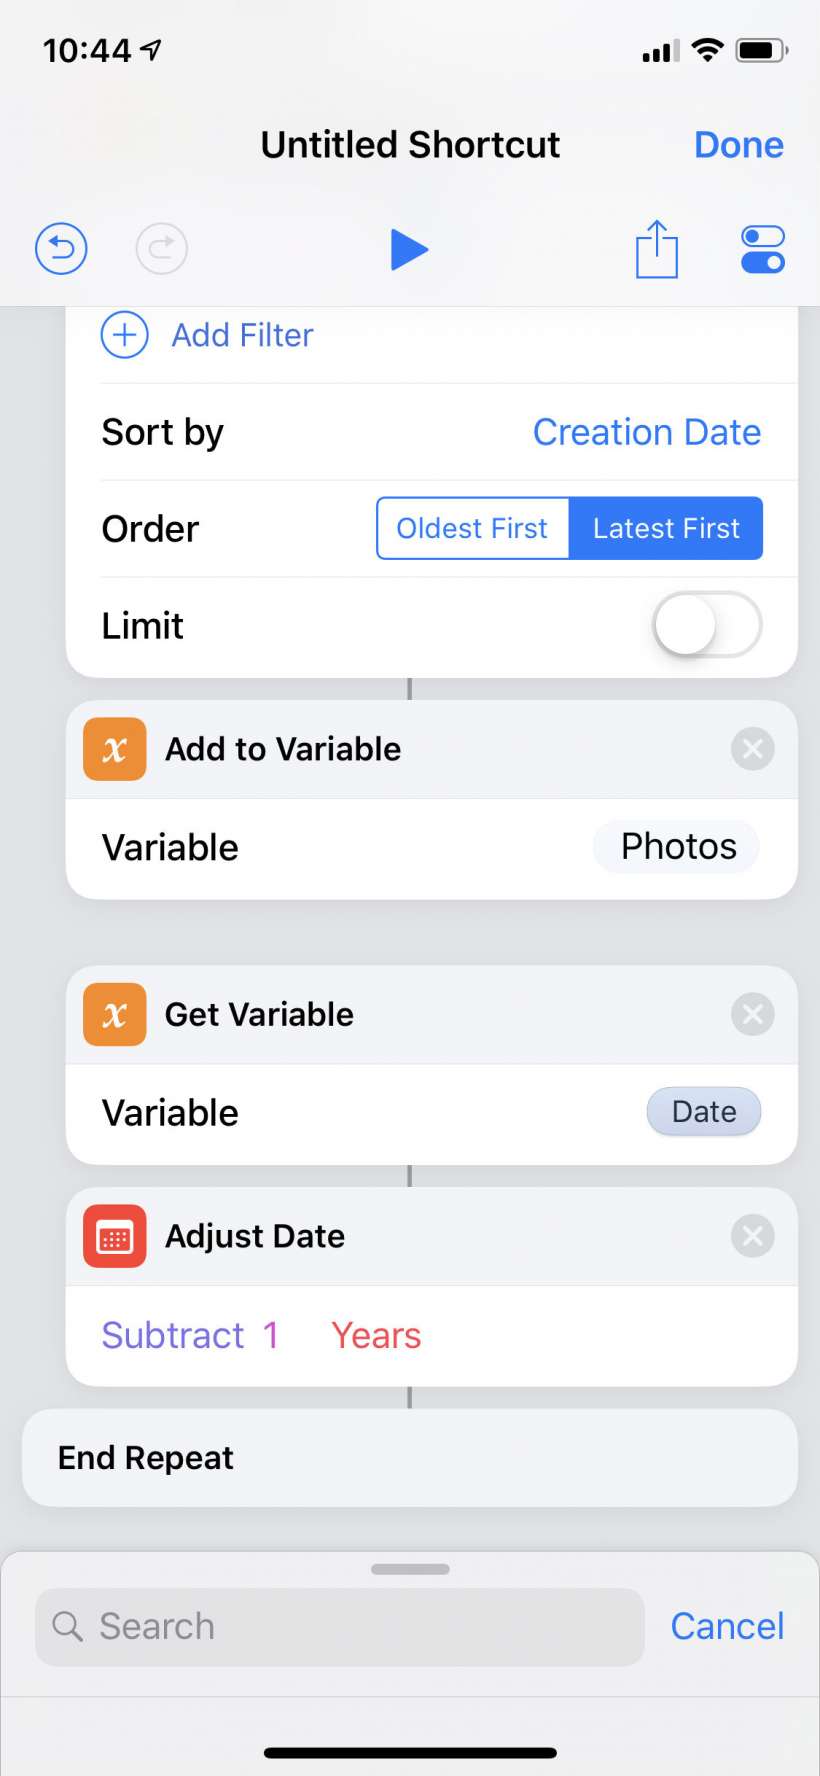
- You probably want the photos sorted, so tap on None and change it to "Creation Date." Now you can select an order - "Latest First," or "Oldest First."
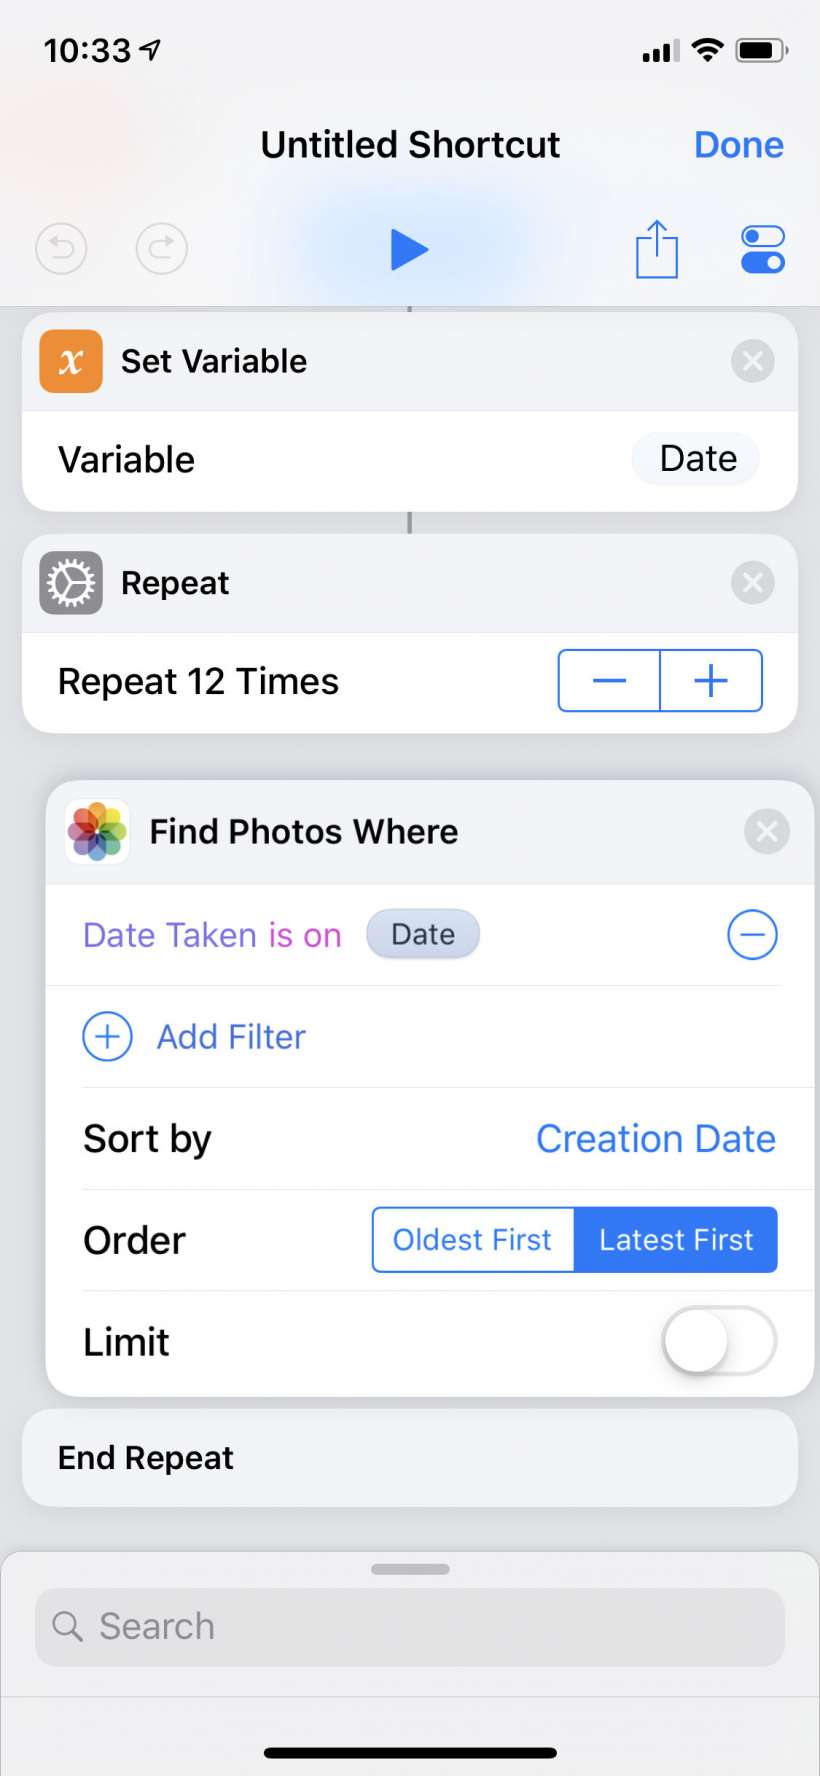
- You will notice the "Find Photos" action is outside of the Repeat loop, so long press on "Find Photos Where" until you have grabbed it, then drag it to above "End Repeat." Let it go to place it.
- Now we want to store the results of this action in a new variable, so search for and select "Add to Variable" and name it "Photos." Drag this into the Repeat loop and place it underneath Find Photos.
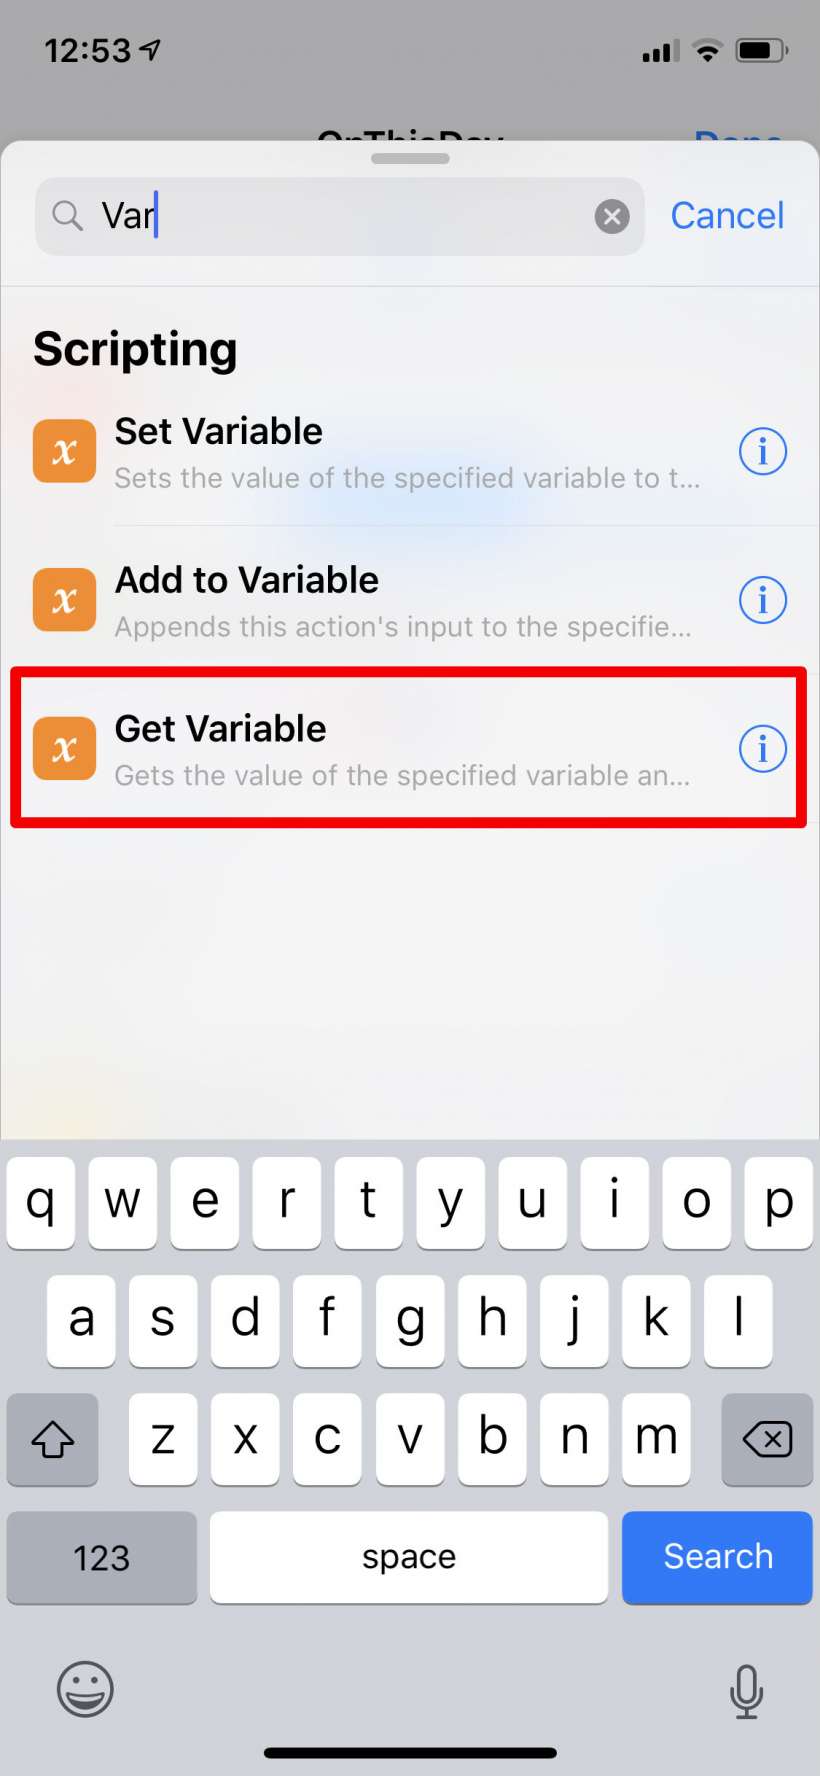
- Now we want to subtract a year from our date and repeat the loop. Search for and add the "Get Variable" action.
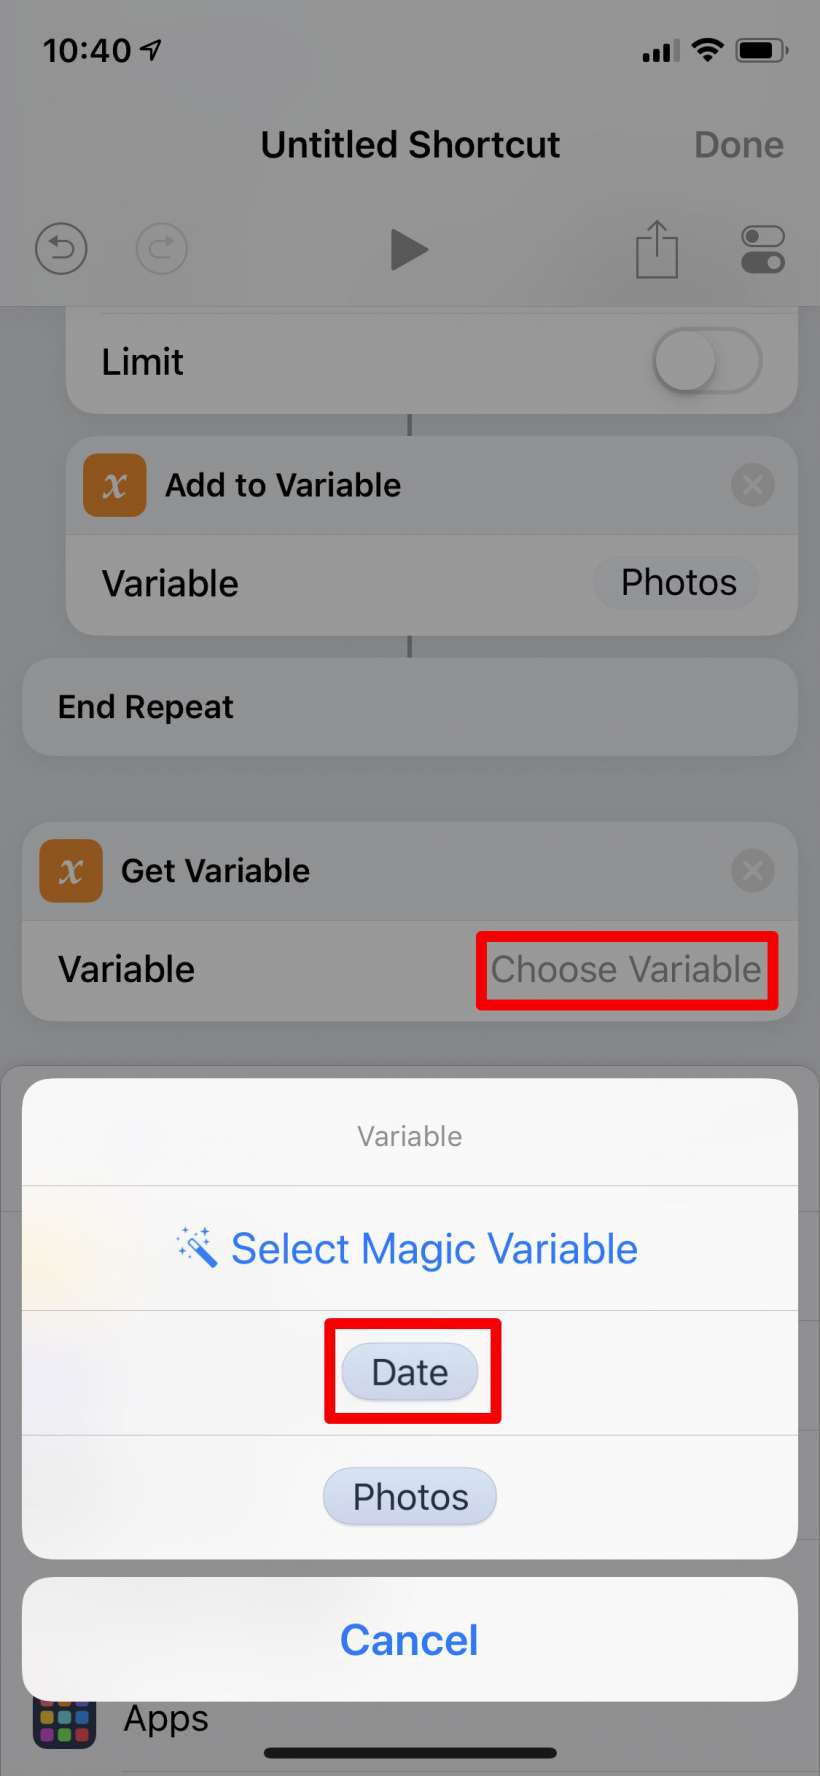
- Tap on Choose Variable and select our Date variable, then drag the action into the loop and place it under Add to Variable.
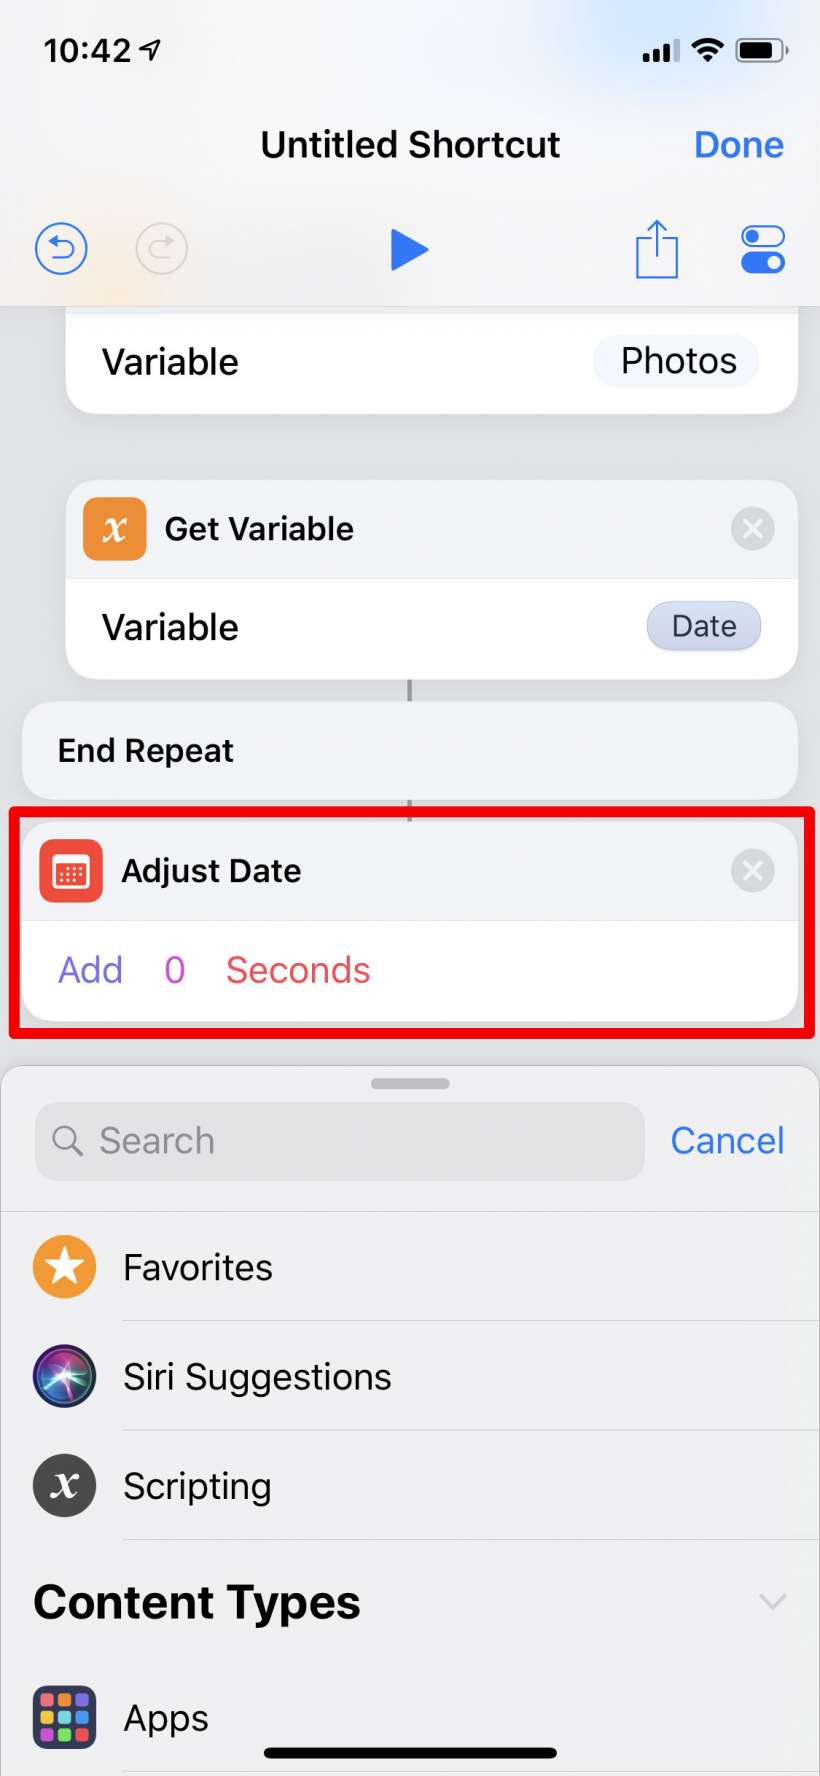
- To manipulate the Date variable, search for and select "Adjust Date."
- Change "Add 0 Seconds" to "Subtract 1 Years" by tapping on the individual components. Drag and place it under Get Variable when you are finished.
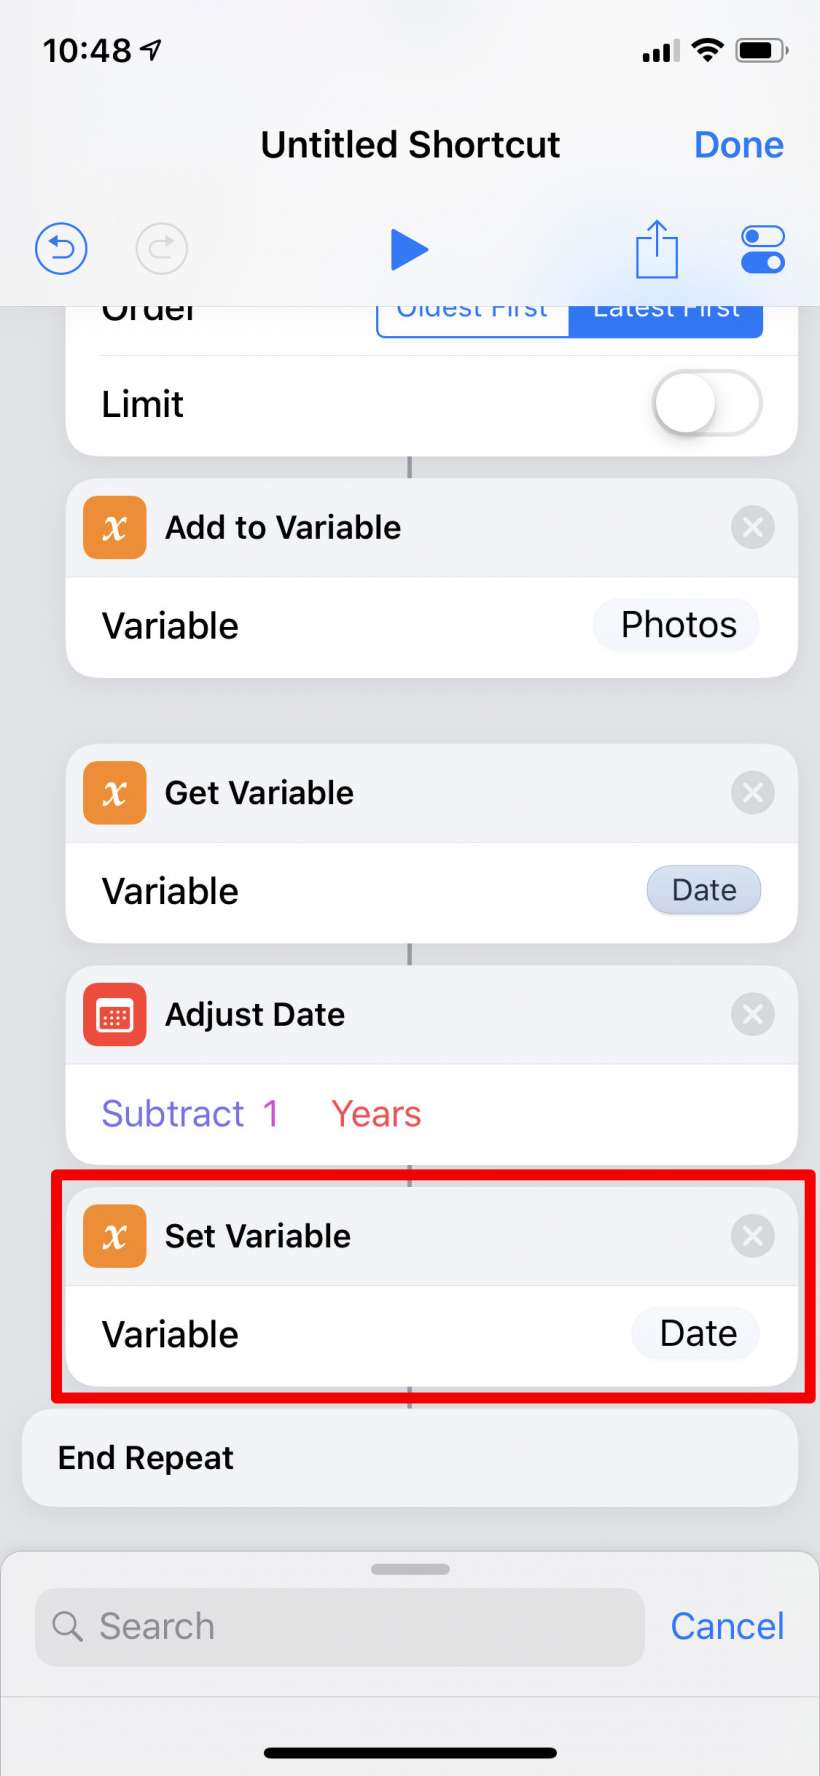
- After the adjustment we want to store it as the Date variable again (this isn't automatic as the programmers among you might expect), so search for and select "Set Variable" and type in "Date" as the name. Drag it into the loop underneath the Adjust Date action.
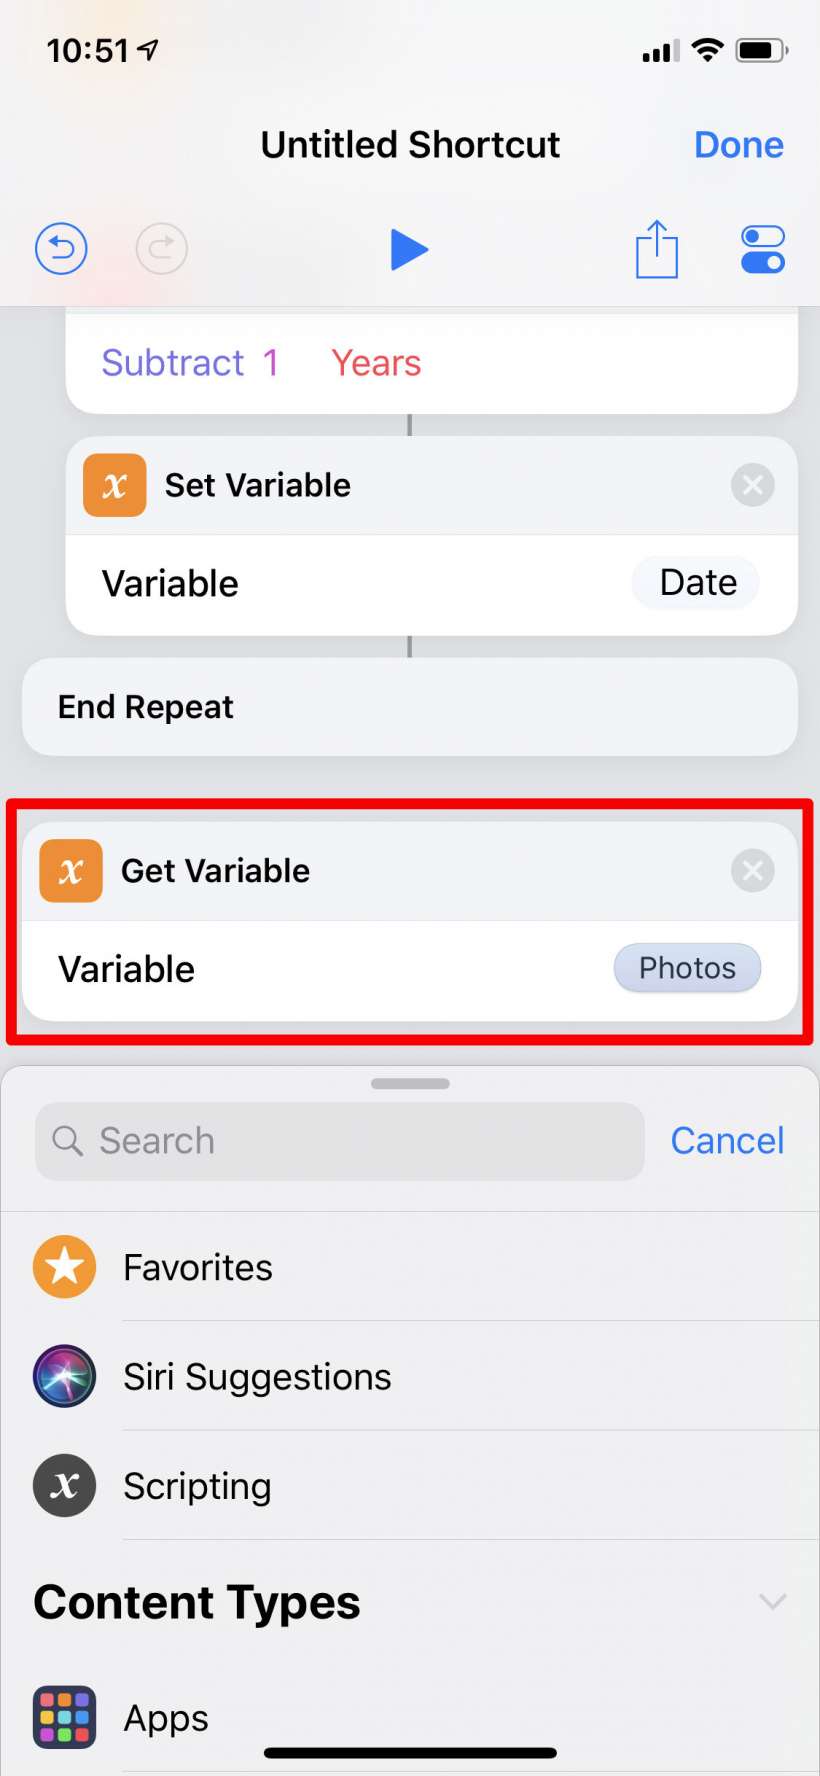
- That completes the loop - it will find all of the desired photos and store them in the Photos variable. Now we just need to display it. Search for and select "Get Variable" and select the Photos variable.
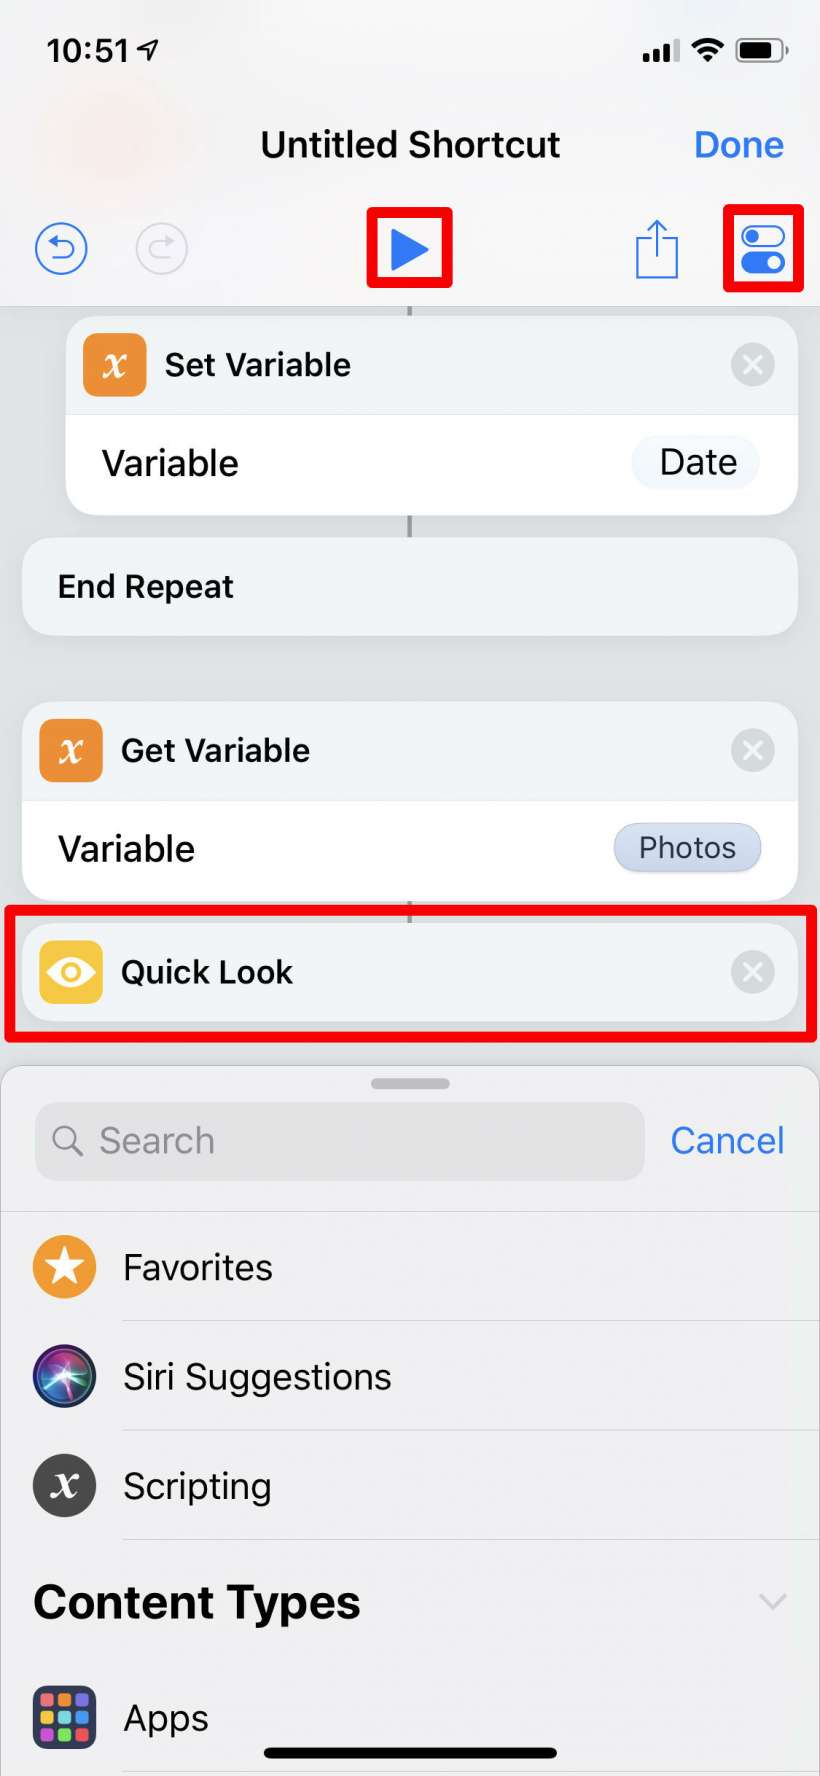
- Now search for and select Quick Look. With that the shortcut is complete - tap on the Play button to see if it works. You can give your shortcut a name, icon and more by tapping on the button that looks like toggles in the top right.



Your Shortcut is now available in your Shortcuts Library. You can add it as an icon on your Home screen by following these instructions.
Unfortunately, while this shortcut will show you all of your photos from previous years, you can't see what year the photos are from. There is a somewhat clunky workaround for this - you can add a Get Variable action to get the Date variable followed by an Add to Variable that adds it to the Photos variable. Put this as the first two actions within the Repeat loop, above the Find Photos action. With this in place you will see a white page with the date in small text, followed by photos from that date. You will see this even if there aren't any photos from that year, so you may see many in a row without any photos. It works fine but isn't aesthetically pleasing.