Submitted by Jon Reed on
Apple's native Maps app has been around for about three and a half years at this point, initially launching with iOS 6 in September of 2012. Unfortunately, when it first made its debut, most people were already using Google Maps and on top of that, Apple's Maps suffered some setbacks due to reported inaccuracies. It has quickly gained market share since its early woes, but it may still remain relatively unfamiliar to many iOS users. Whether you are already a fan of Maps or barely know how to use it, here are ten tips (beyond the normal navigation routine) that can help you use it more efficiently:
1. Drop a pin
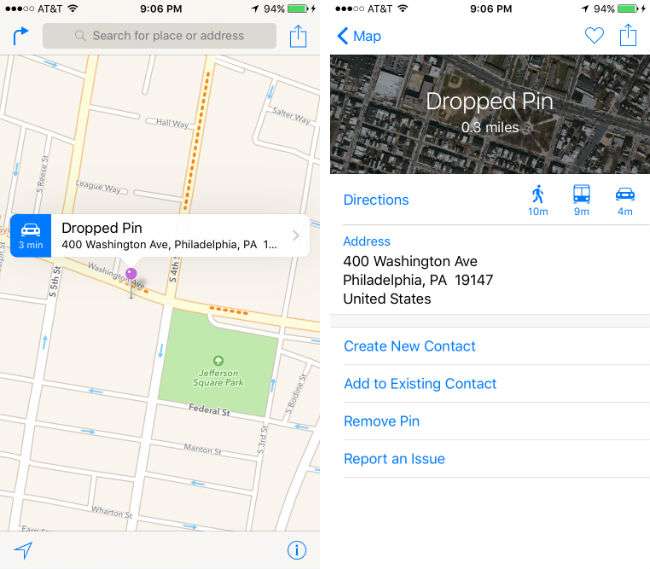
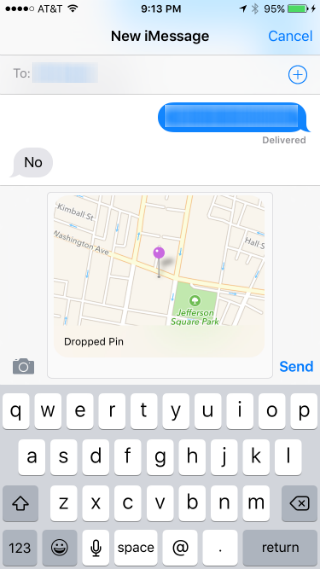
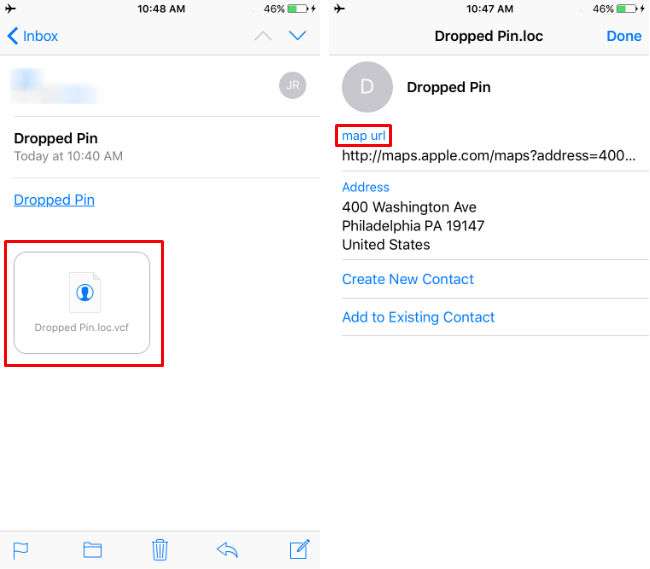
Dropping a pin is a great way to get directions to a place that you don't have an address for, but know the general location of. Tap and hold on the map to drop it. Once the pin is there you can get directions to it, create a new contact, add to an existing contact and share it with friends, which is perfect for setting up a rendezvous point. It's also a great way to add your friends' addresses - just drop a pin and add the location to their contact information whenever you are at their house.
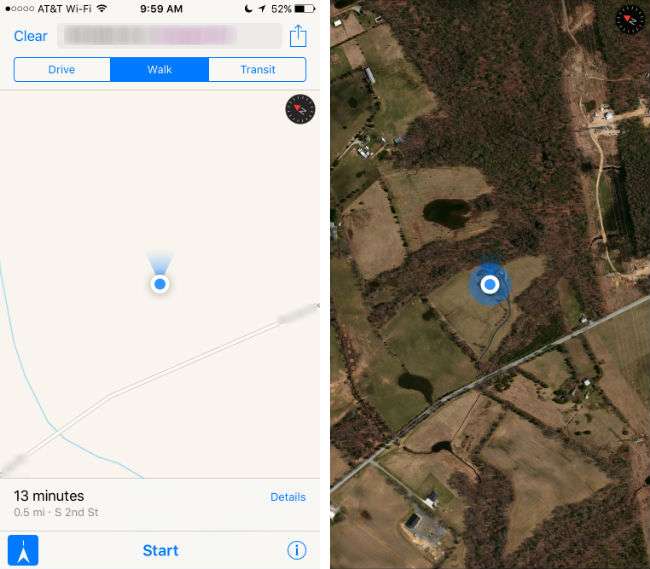
Compass mode is especially useful if you're out in the countryside. It will rotate the map in the direction that you are heading, making it much easier to orient yourself with your surroundings. You can activate the compass by tapping the Location button in the bottom left. Once the map has centered on you, tap it again and blue beam of light (for lack of a better description) will appear in front of your location indicator and a compass will appear in the top right that will rotate as you move, indicating north. It becomes a more powerful navigation tool when used in conjunction with satellite view, which will show you landmarks that will help you get your bearings. Activate this by tapping on the "i" button in the bottom right and selecting Satellite.
Newest iPhone FAQs
3. Email yourself a .vcf
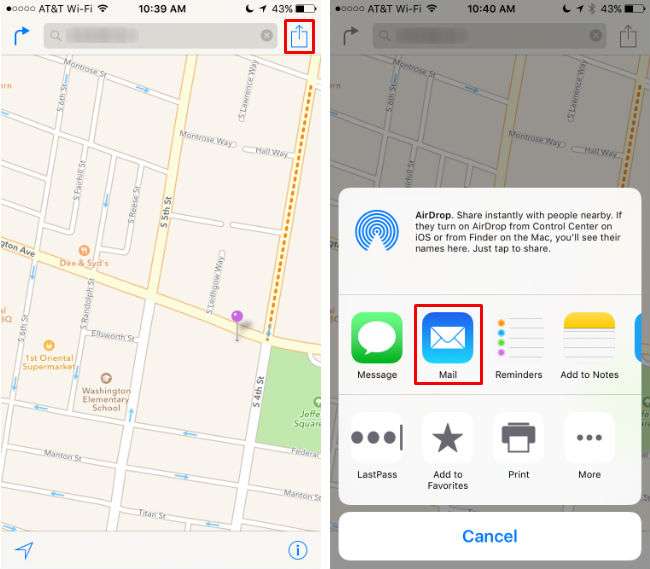
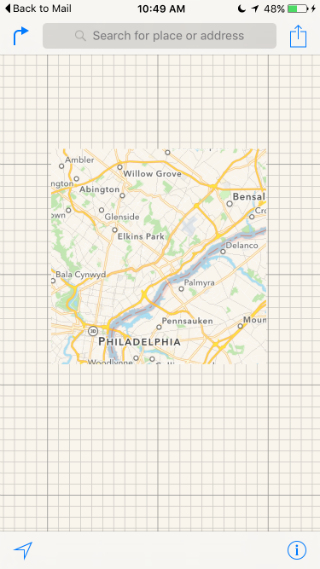
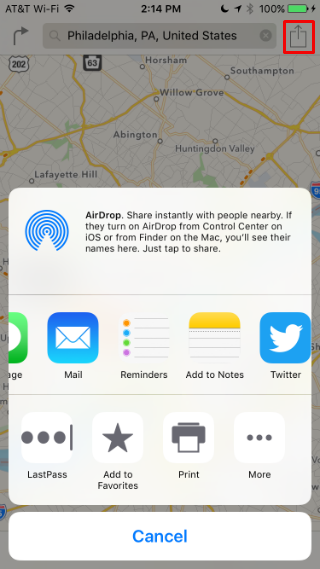
The OS X version of maps will let you export a PDF for offline viewing, but if you are on your iPhone and expecting to not have service, you can email yourself a map in the form of a .vcf file. You can open this file with Maps even if you have no service. While the whole world won't be at your fingertips, it will give you a sizable map that you can zoom in on. You can do this by tapping the share button in the top right and selecting email.
4. Find what apps are popular nearby
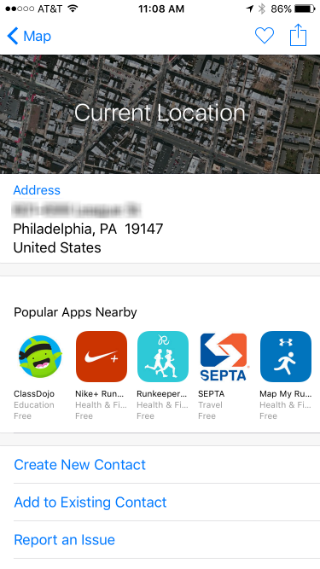
Find out what apps the locals are using. Sure, you may only see apps that are popular everywhere, but you might see something local that is useful, like the local transportation authority or news/culture sources. To view these, tap on your location indicator, then tap on the "Current Location" label that pops up.
5. See traffic
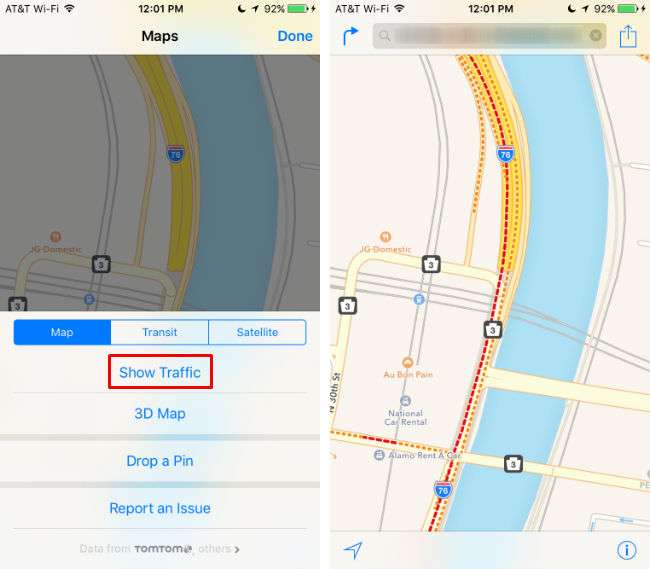
For obvious reasons this is helpful when you are driving. Turn it on by tapping on the "i" button in the bottom right, then tap "Show Traffic." If you see red or orange in front of you, consider a new route.
6. Use Siri
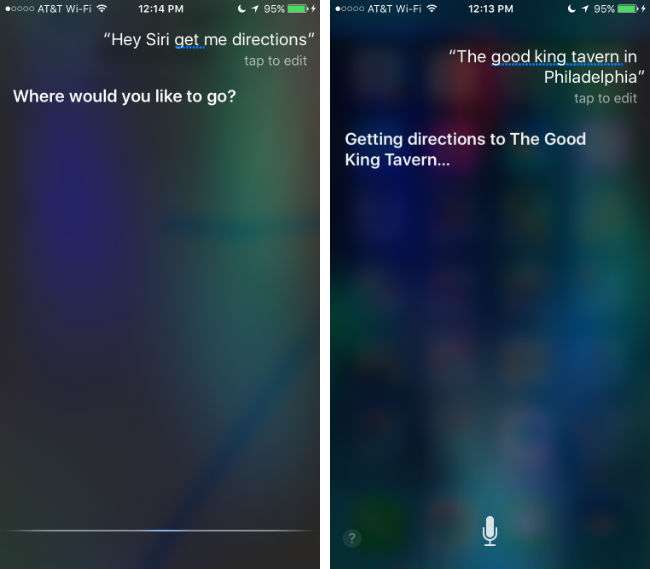
Helpful, but in some instances can be frustrating... definitely has a few kinks to be worked out. At any rate, just yell, "Hey Siri, get me directions to..." somewhere. It often works better to say, "Hey Siri, get me directions." After she responds with "Where would you like to go?" then you can say the address or name of venue. Siri is especially useful for questions like, "Where is the closest restaurant?" and such.
7. Balance the volume
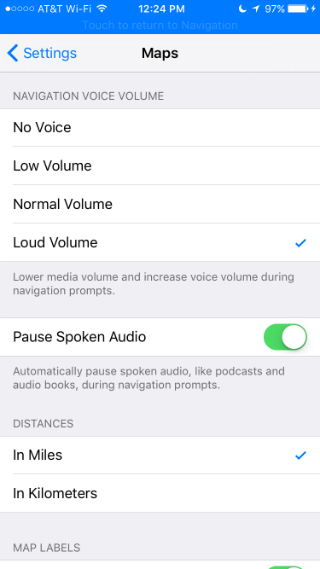
If you have Maps dictating directions to you, chances are you are driving, in which case you have the general noise of driving, plus the radio. You can raise Maps' voice volume without elevating the volume of every other sound your iPhone makes. You can also turn it off completely if you don't want your music interrupted, or have spoken audio like podcasts or audio books pause whenever Maps dictates directions. Head to Settings -> Maps to adjust these.
8. Do a flyover
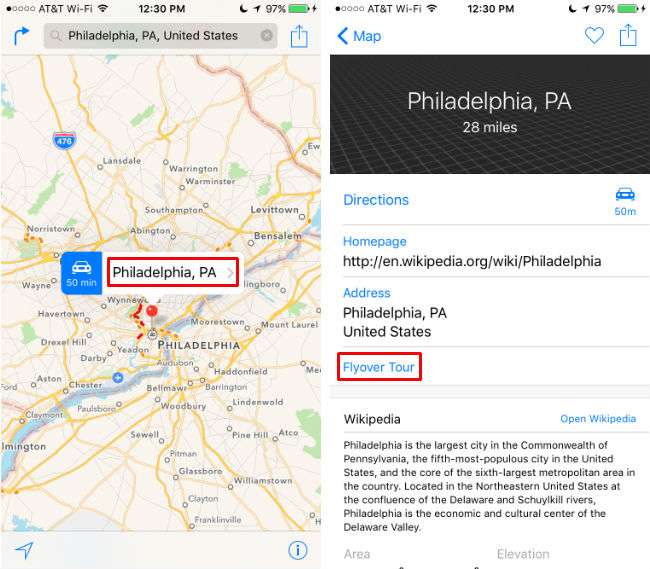
This is a cool feature that will give you a bird's eye view tour of your target city. It's not meant for navigation, but it will highlight all the local points of interest if you are looking for somewhere to go. There are probably somewhere in the neighborhood of 150 cities with flyovers available and the list is constantly growing. To check out a flyover, search for the city, then tap on its label, then select "Flyover Tour" if it is available.

9. Share a location
Tapping the share button in the upper right allows you to share a location with friends via Mail, Messages and any number of third party apps like Facebook, Twitter, etc. You can also add it to a note or set a location based reminder here as well.
10. View location history
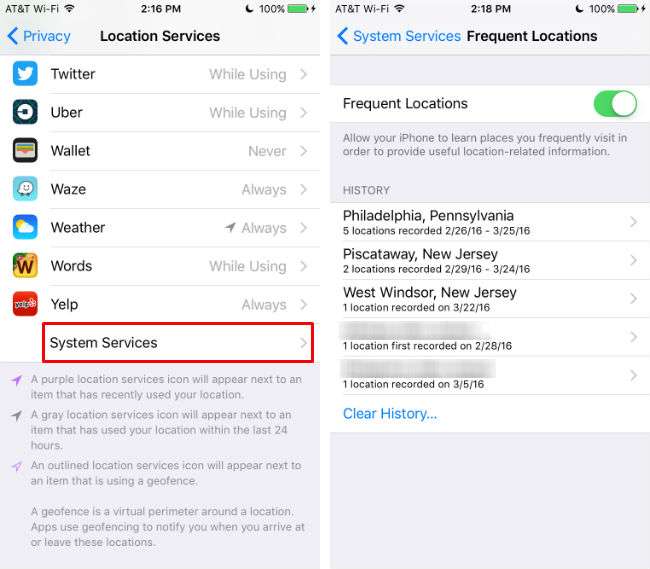
You can retrace your travel history with Frequent Locations. You can see where you've been recently and when you were there, so it can also help you figure out how to get back somewhere. It gets pretty detailed, down to the hours you spent somewhere, and it will show your locations on a map. If you feel it is too intrusive, you can protect your privacy by turning it off.
