Submitted by Jon Reed on
The PDF, or Portable Document Format, was designed as a reliable way to exchange documents independent of software, hardware or operating system. As such, it is has become a popular method of sharing a variety of documents, including photos. You can put your photos in a PDF and share them from the Photos app on your iPhone or iPad, though the feature is not at all obvious as it is found under "Print" in the sharing options. Here's how to put your photos in a PDF file and share it on iPhone or iPad:
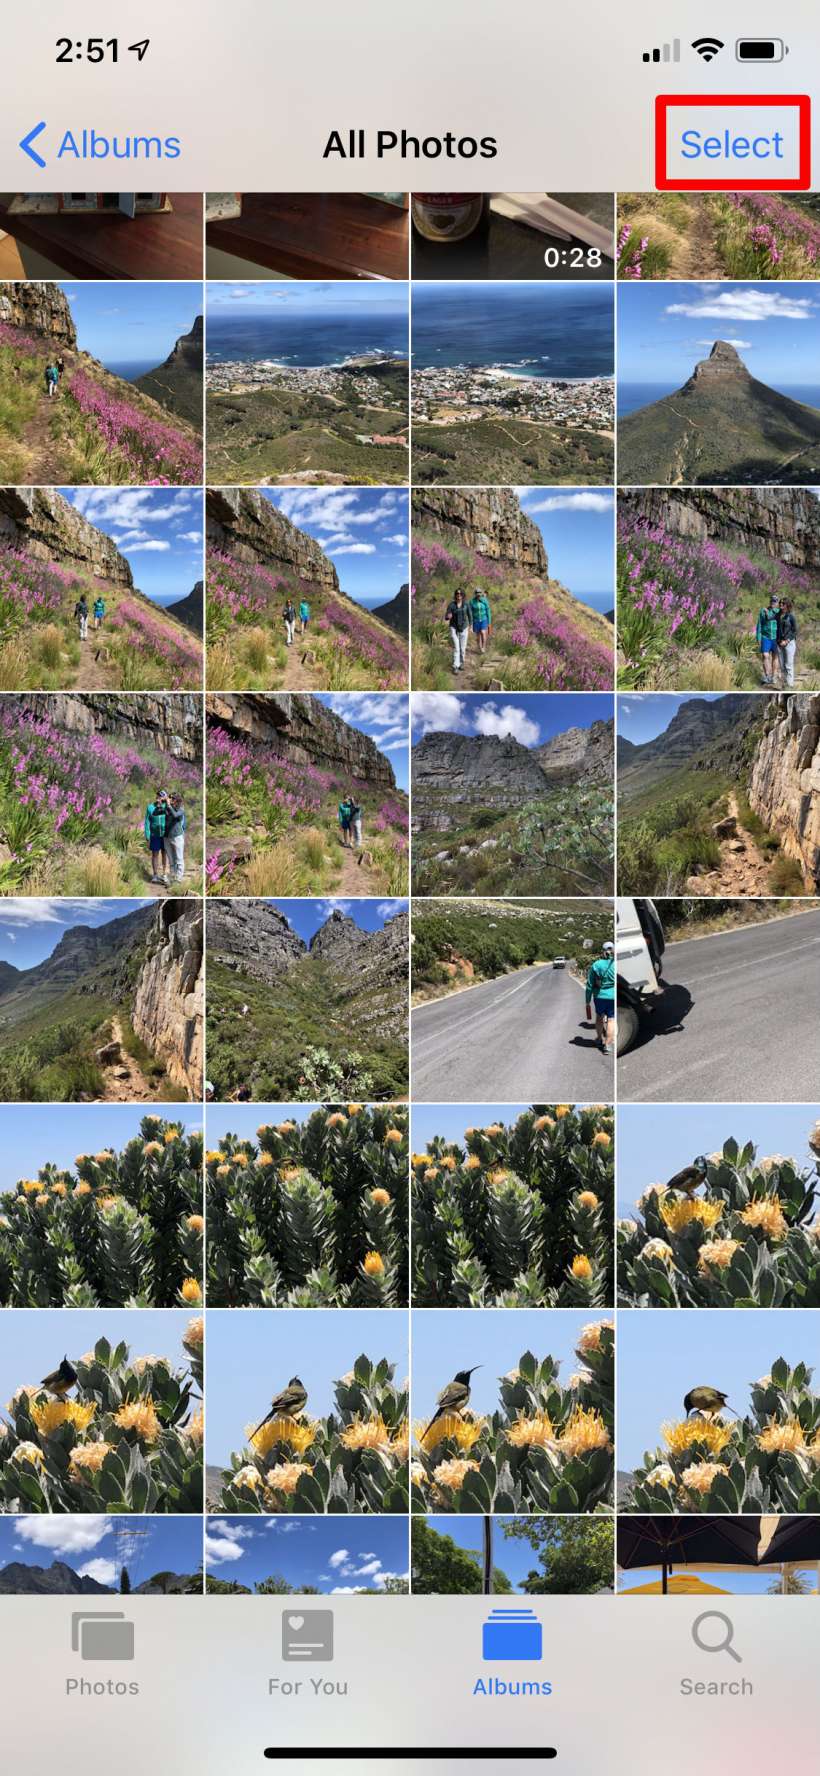
- Open your Photos app, open an album and choose the photos you want by tapping the Select button in the top right corner, then tapping on each photo you want to include. You will see a blue check on the photos you have selected.
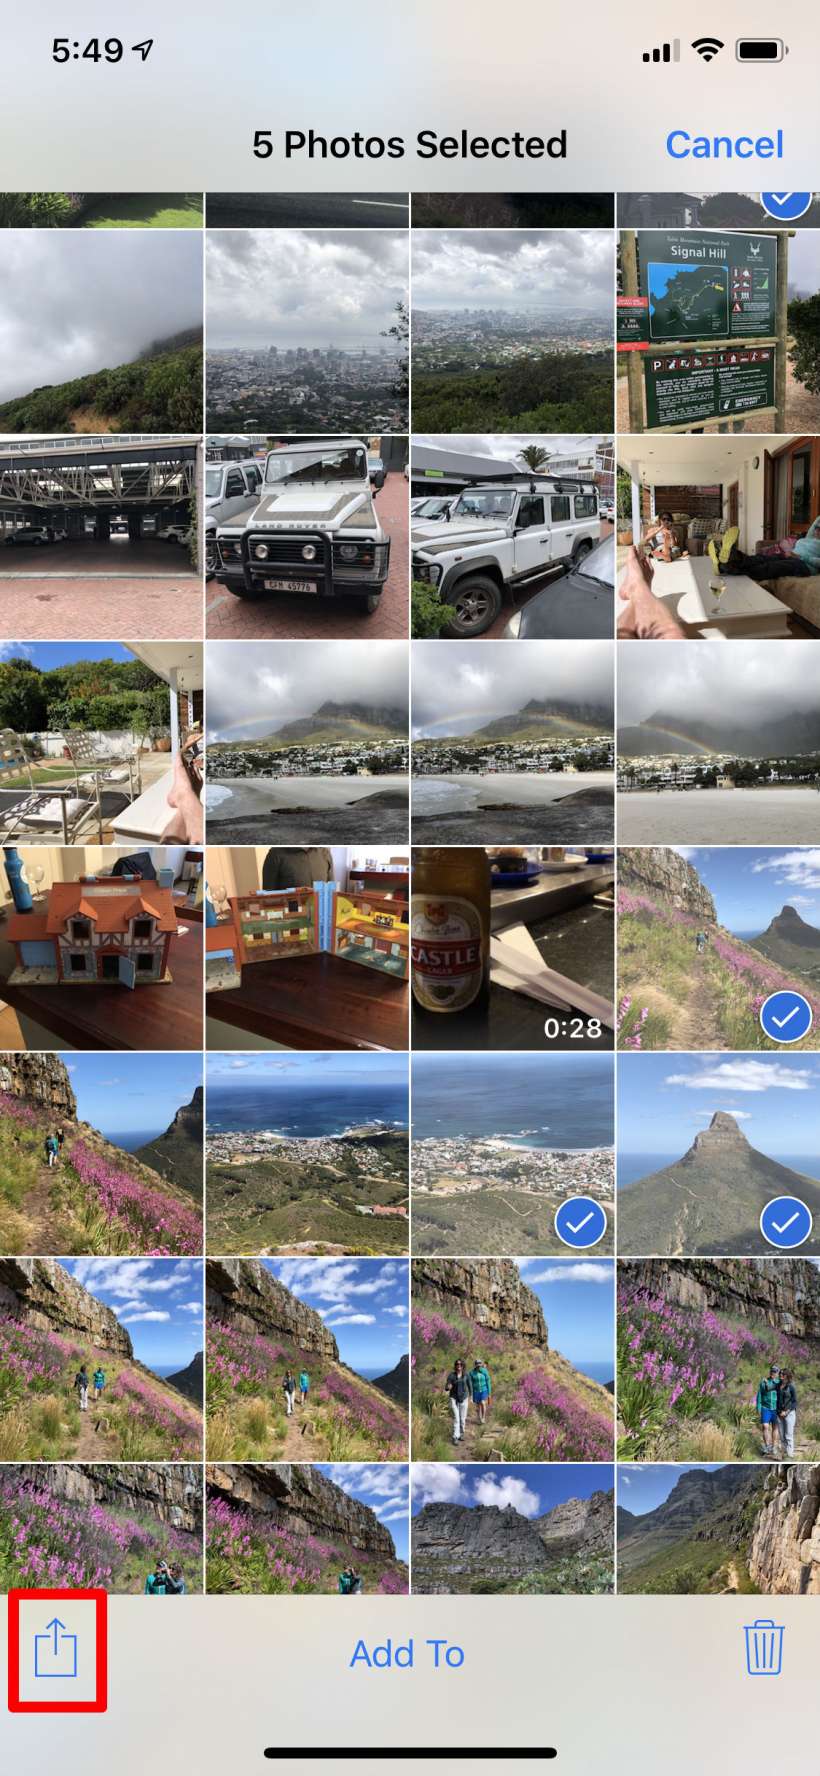
- Once you have all your desired photos selected, tap the share button in the bottom left.
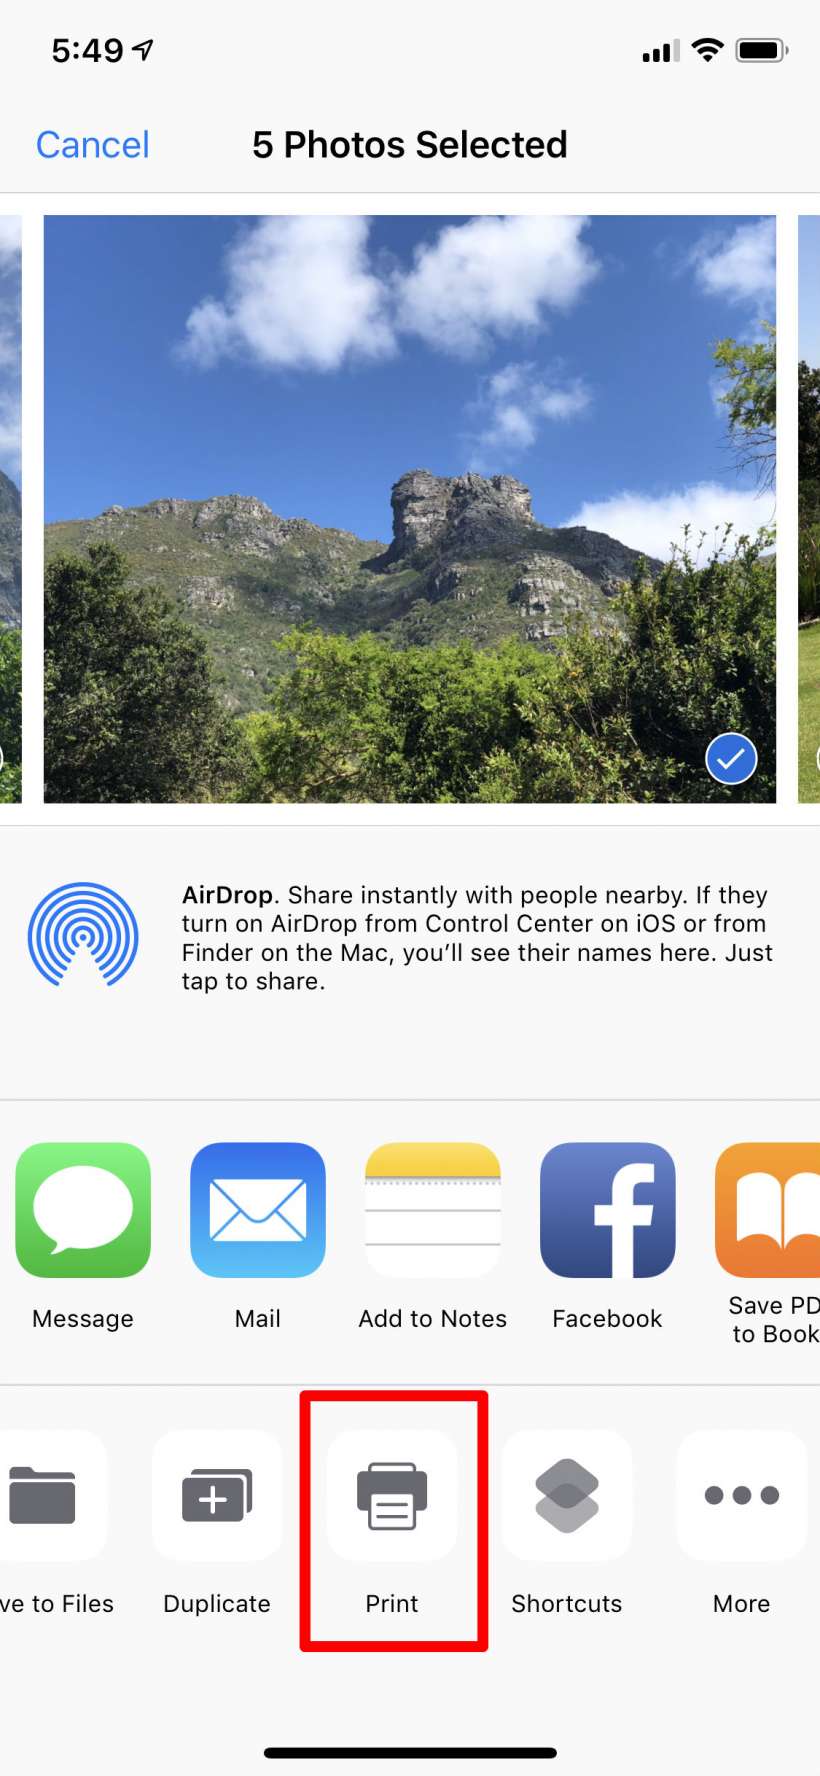
- Scroll to the right on the bottom row of sharing options and tap on "Print."
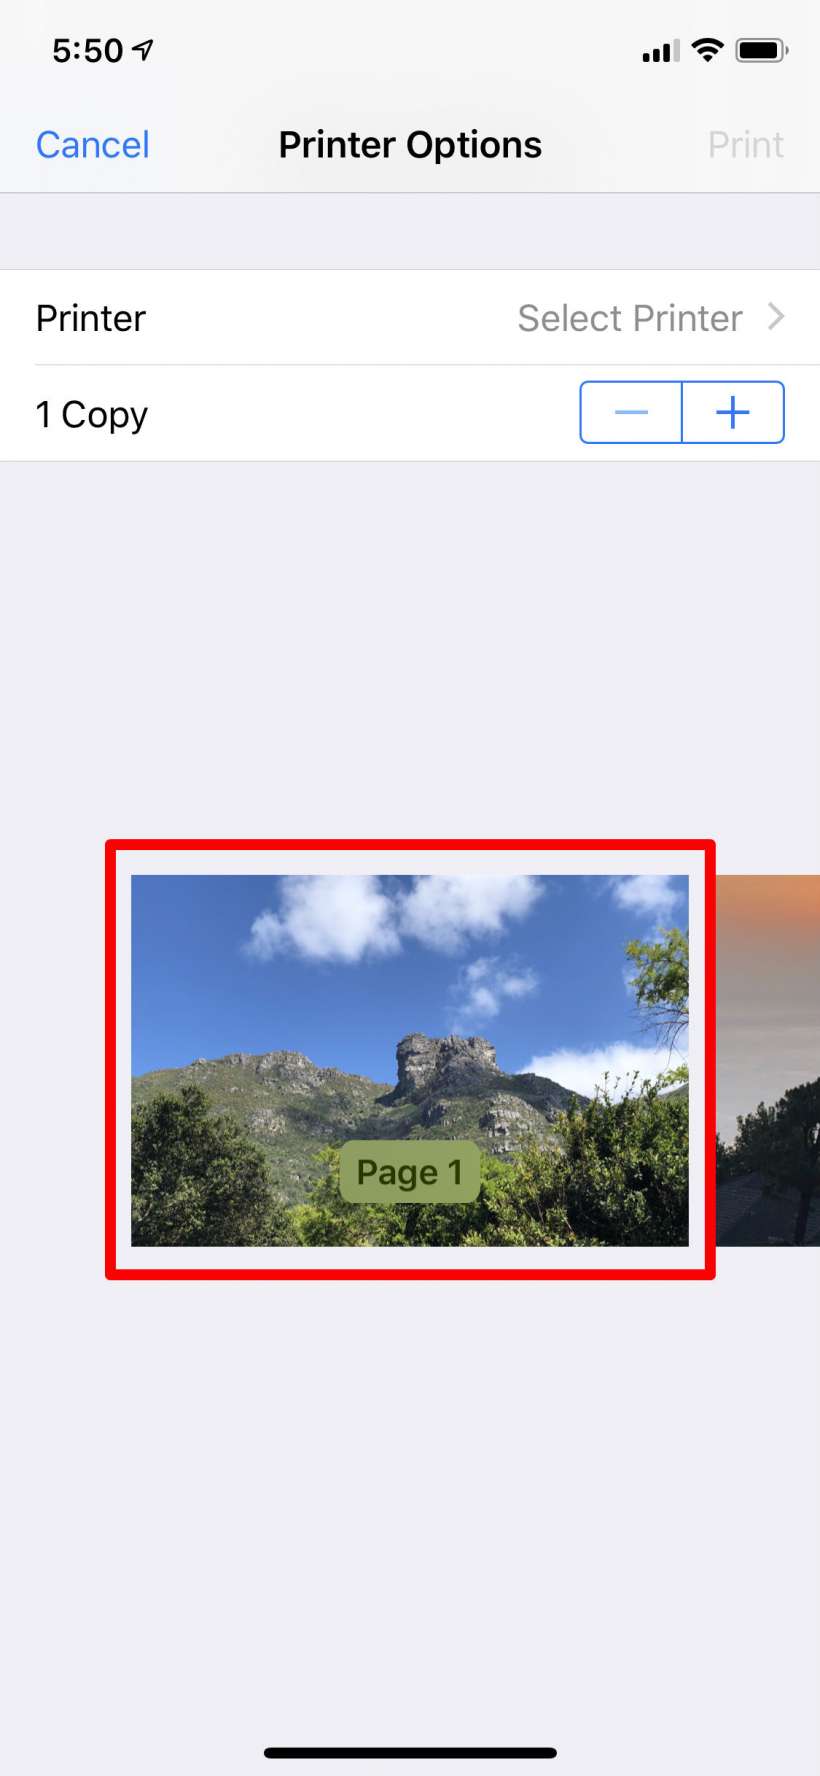
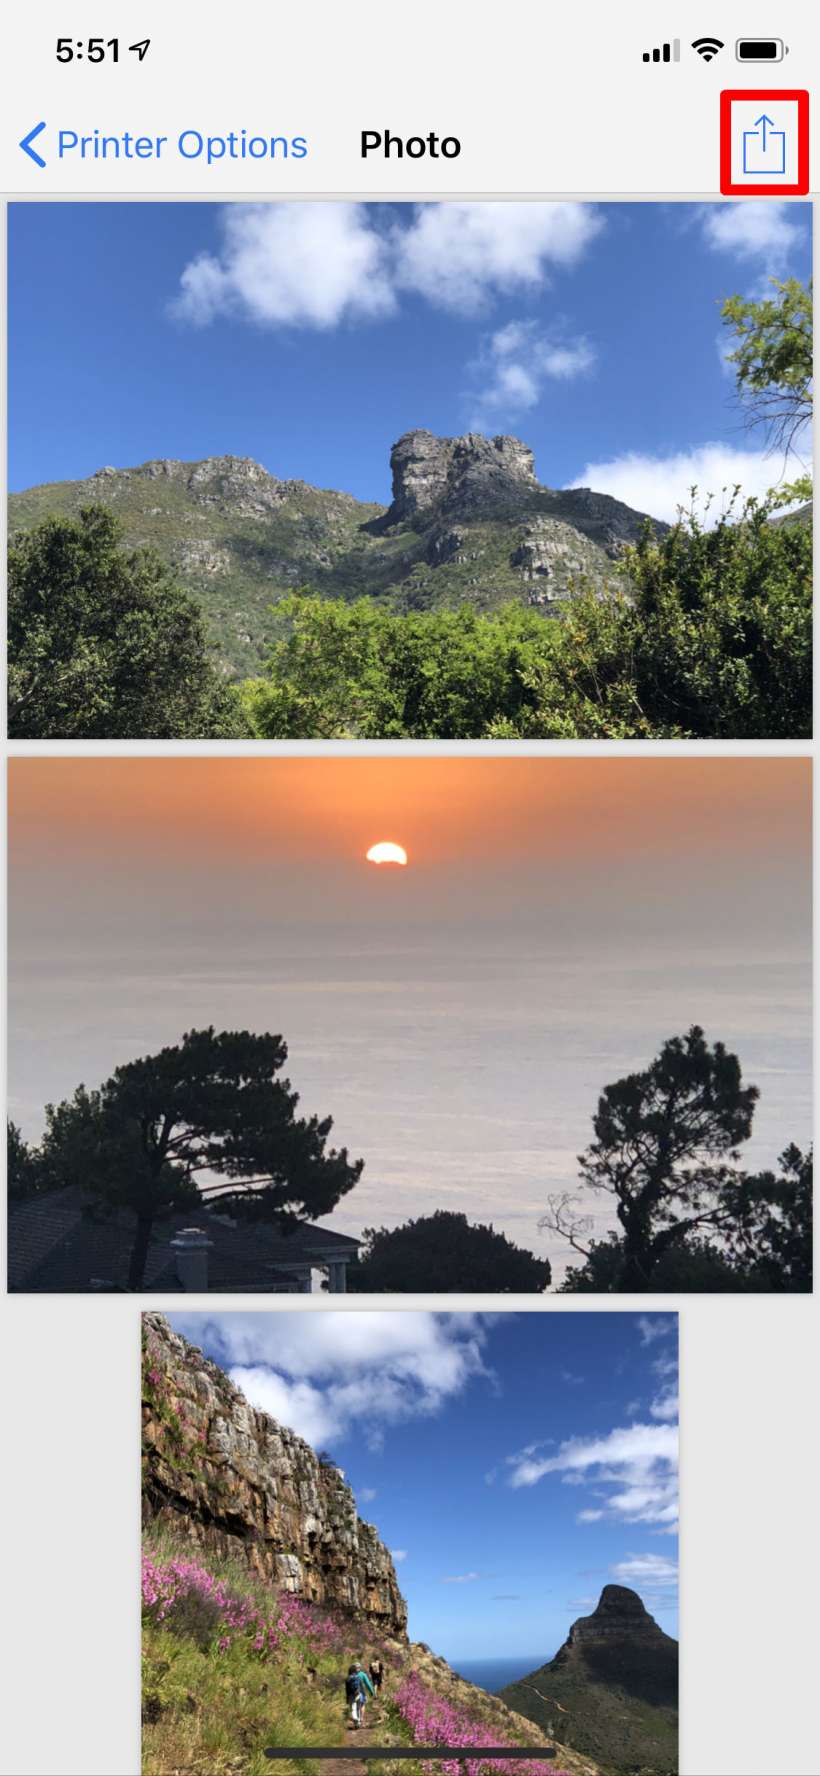
- Now you are the printer options screen. If you have 3D Touch, deep press the first photo, if not you can use the zoom gesture on it to zoom in. Either way will take you to the not-at-all-obvious Photo screen, where you can share your selection of photos as a PDF file. Just tap the share button in the top right.
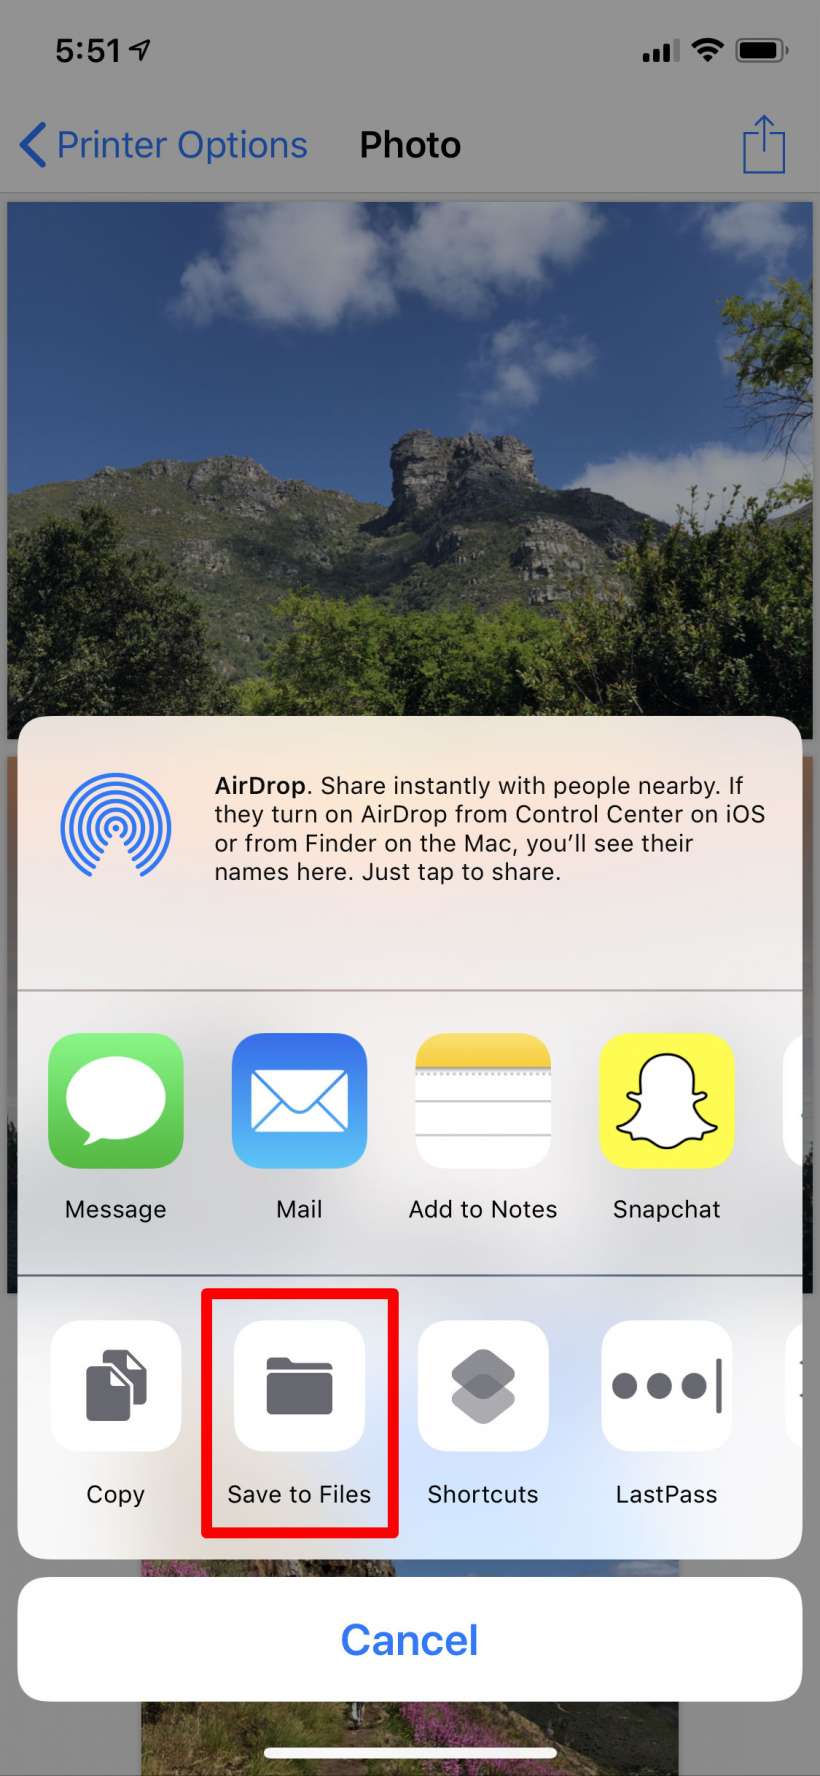
- Now you can email it, send it as a message, save to Files and more. In this example we'll save to Files. Tap on Save to Files then choose where you want it, here we'll do Files -> iCloud -> Documents.
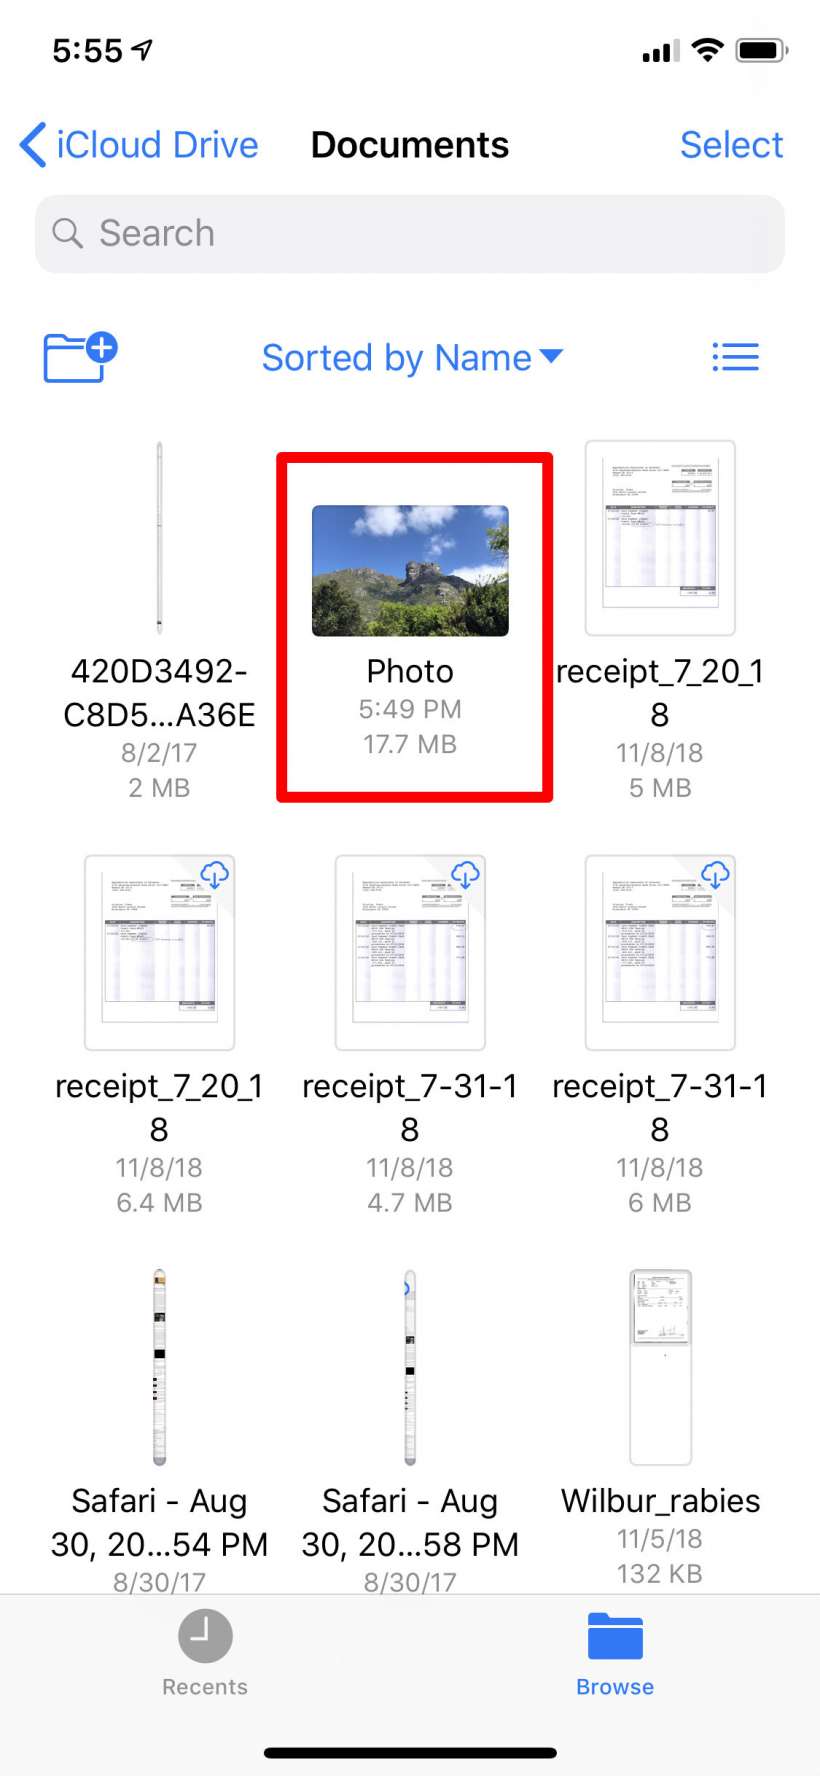
- Now I can open my Files app and there it is in my Documents folder, name "Photo." Now I can change the file name, mark it up, share it, etc.
