Rules are not only a great way to organize your iCloud email inbox, but also can be used as an effective spam filter. Rules are filters that you create that are applied to every incoming email, so you can have emails routed to your various folders, keeping your inbox uncluttered and your messages organized. Emails from your friends can go to their respective folders, messages about an upcoming vacation can go to a vacation folder, junk mail can go straight to trash, and so on. Rules are simple to set up, here's how:
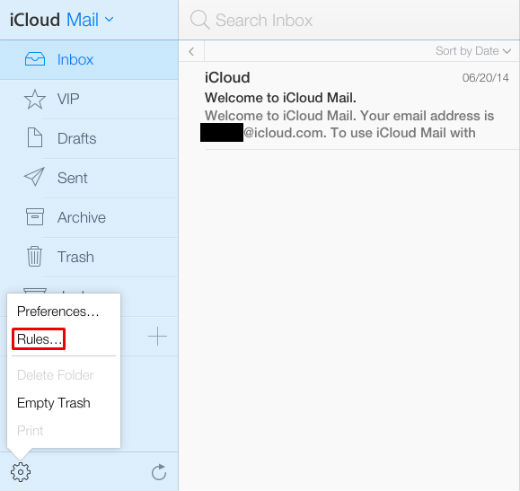
1. Log into your iCloud account and go to your email. Click on the gear shaped icon in the lower left (this is the "Actions Menu") and click on "Rules."
2. The Rules window pops up. To make your first rule, click on "Add a rule" on the right hand side of the window. This brings up another small window, where you'll create the rule.

